


Welcome to Part 2 of building your first iOS application! In this post, we will start working in our View Controller file and start populating our Table View with contacts! We are going to pick up right where we were at the end of Part 1. If you haven't completed Part 1 of this series, you can check it out here. Let's get started!
Building our Contact List
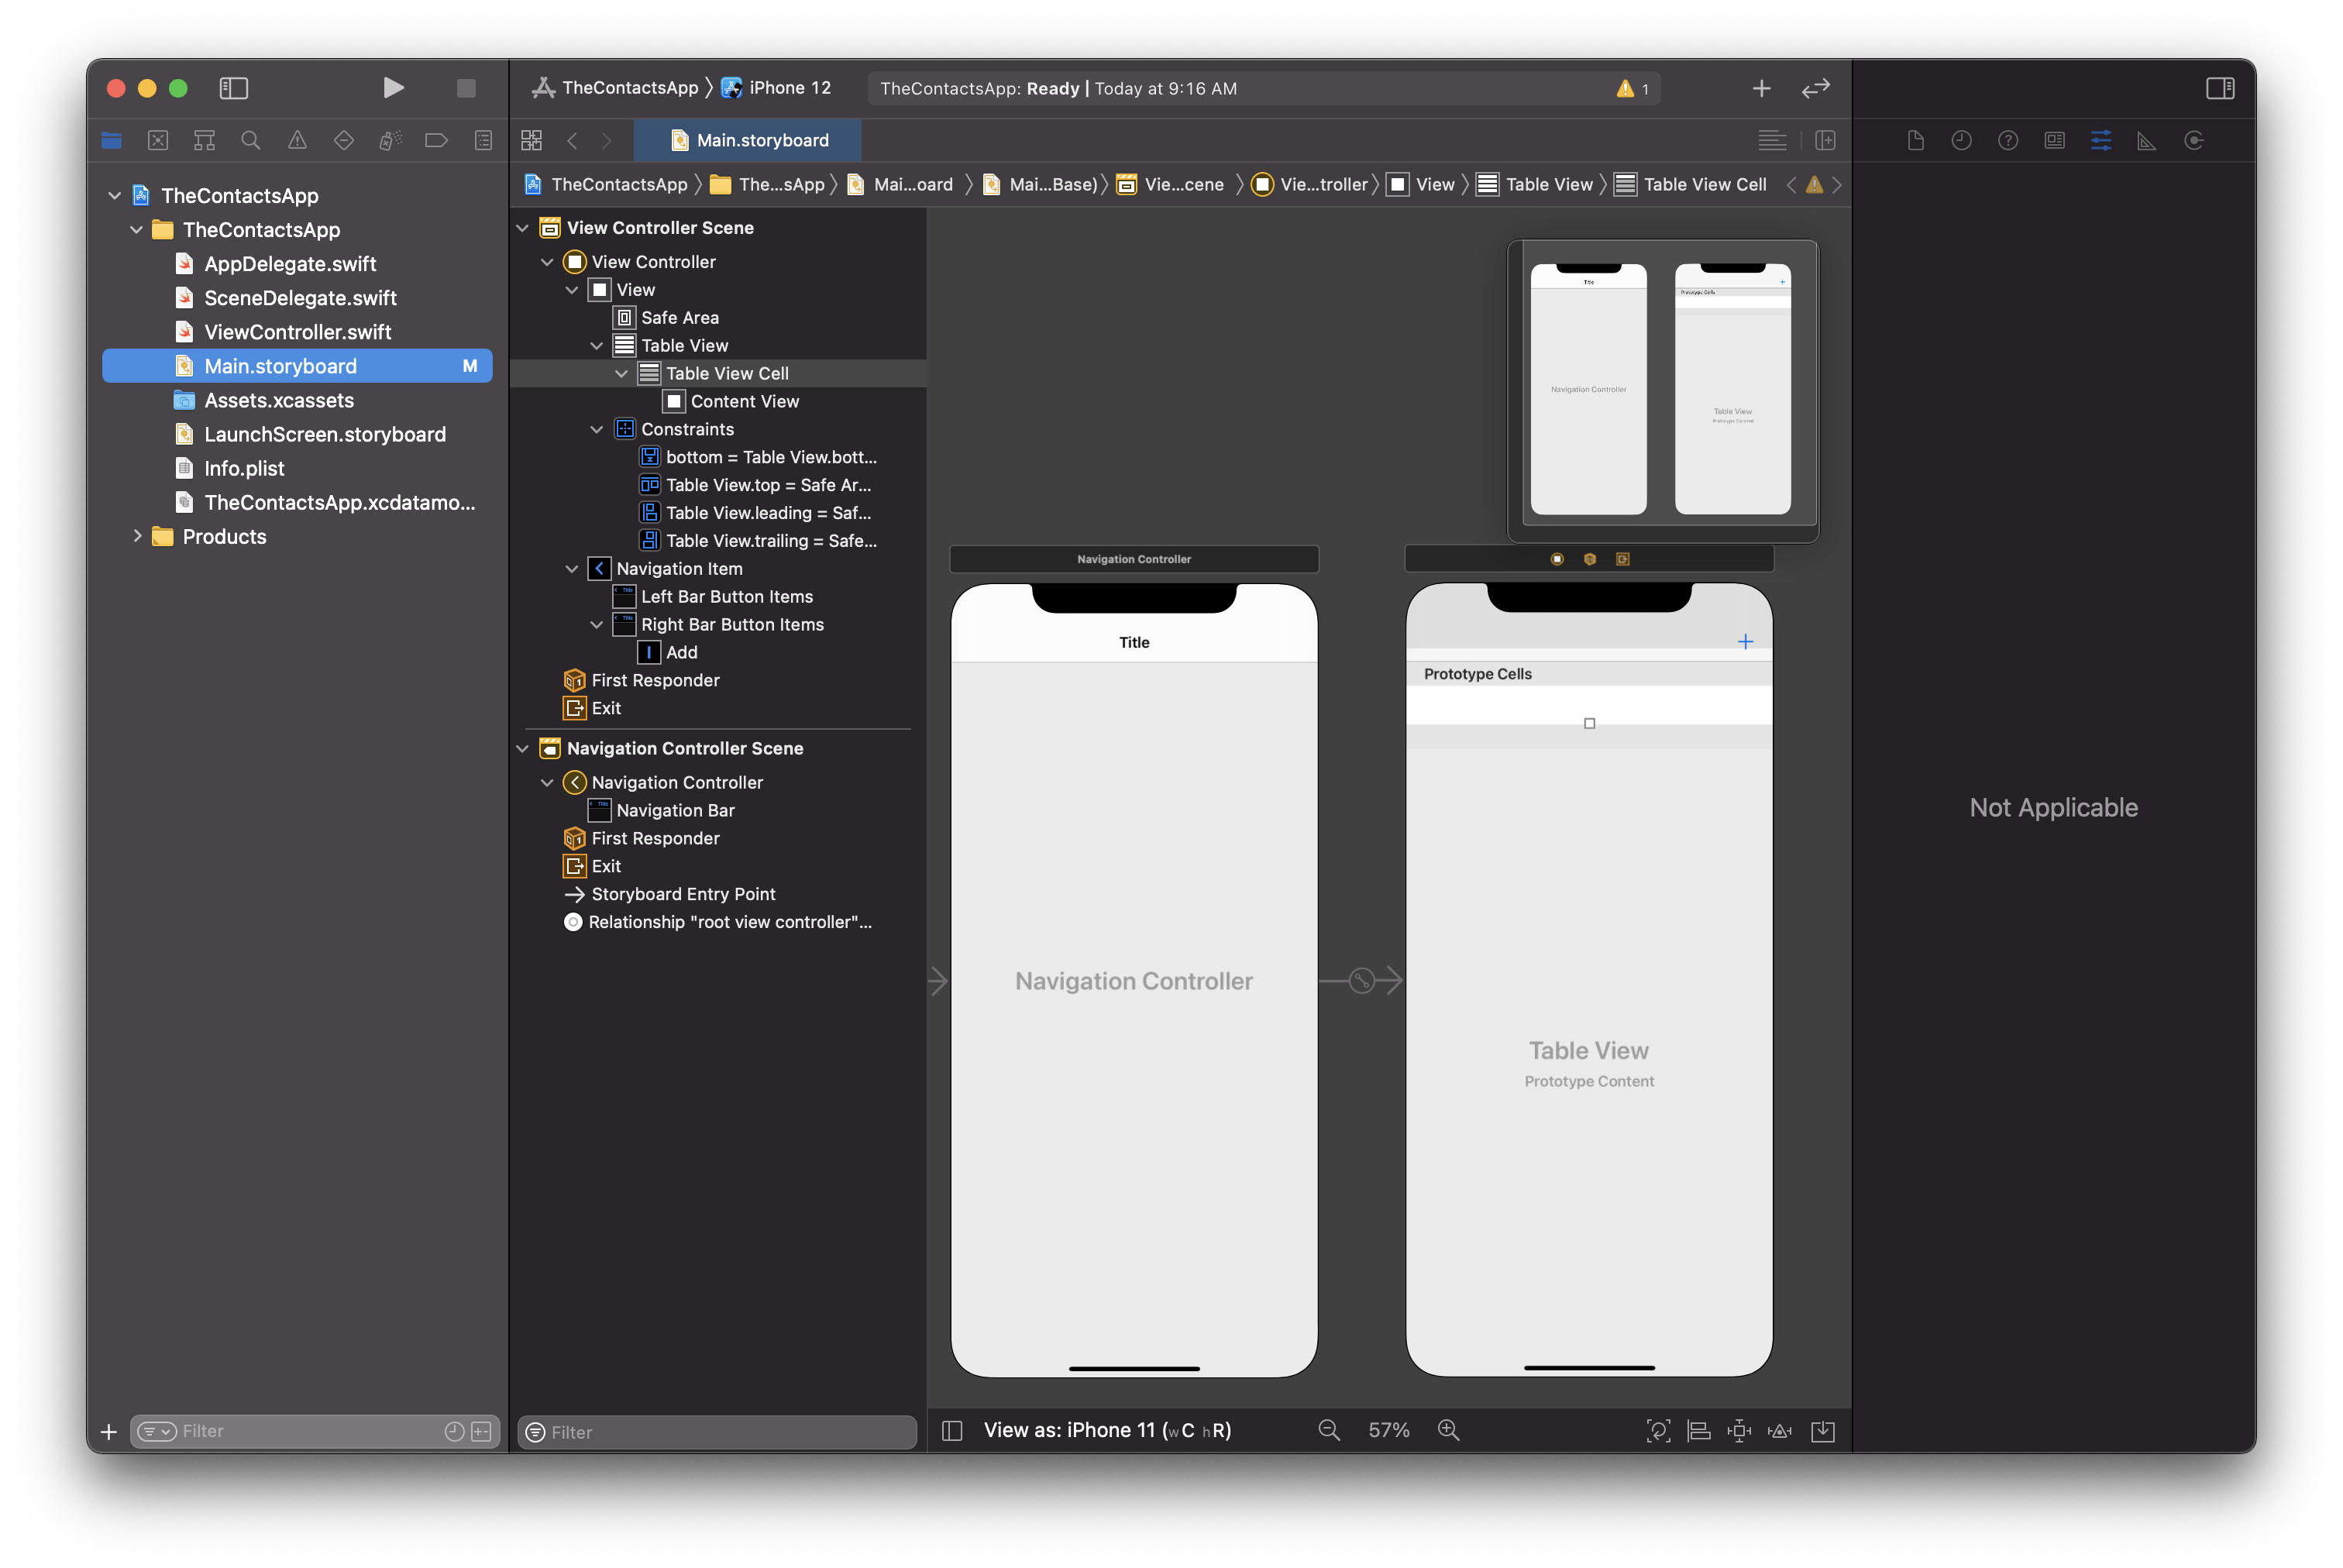
Unlike the last post, we aren't going to spend much time dealing with UI or the Main.storyboard file. There are just a couple things we still need to set up in order to start coding. If you haven't done so already, open up your project and select the Main.storyboard file. Yours should look something like this:
Before we start coding, we are going to make some changes to the attributes of our Table View Cell. Let's do that now.
Modifying Attributes
In your Main.storyboard file, I want you to select the Table View Cell in the Document Outline. If done correctly, you should see the following properties appear in the Attributes Inspector like shown below:
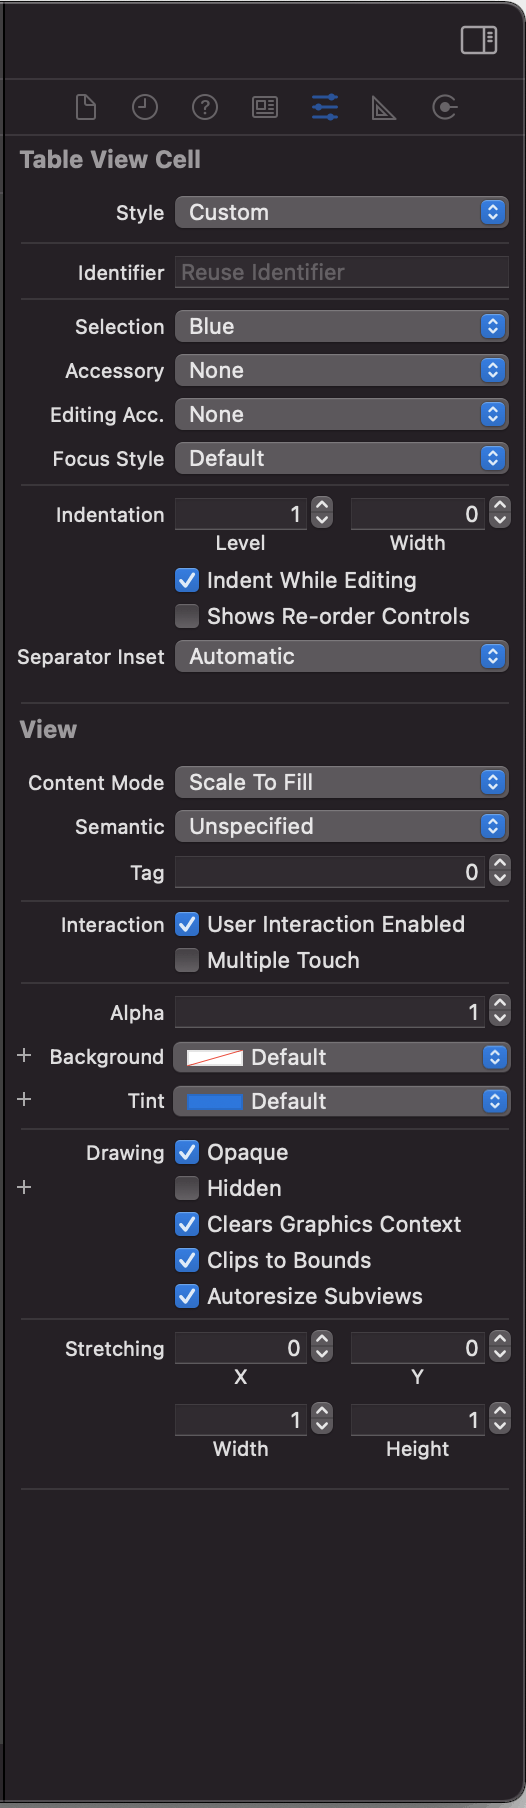
We are going to make a couple changes to the attributes. First, in the Style dropdown, change the style to Basic. Next, in the Identifier text field, add the text, ContactCell (I'll explain why we need to add this later on in the post). Your attributes page should now look like this:
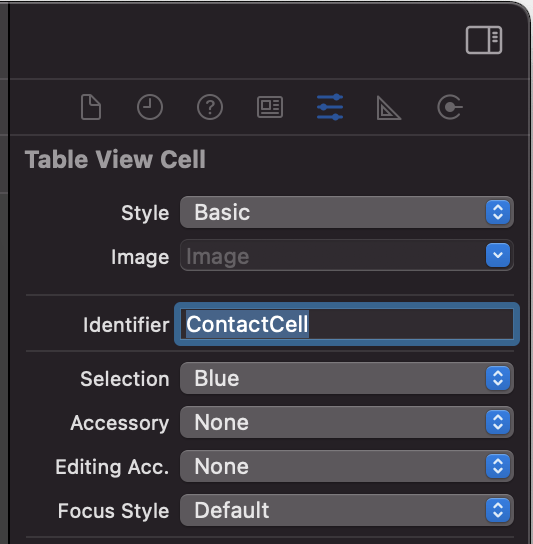
That's it! Those are all the attribute changes we will make right now.
Connecting our Outlets and Actions
Now that we set our attributes the way we want, we need to give our code a way to interact with the elements we added to our UI. We do that by setting up IBOutlets and IBActions. There are a few ways this can be done, but my personal favorite (and the way I'll be demonstrating) is the drag-and-drop way.
The first thing we need to do is open our ViewController.swift file in another editor window. The easiest way I have seen to do this in Xcode 12 is to use the keyboard shortcut, control + option + command + return. If the ViewController.swift file doesn't automatically appear, click the bar over your view controller screen in the storyboard. Your screen should now look like this:
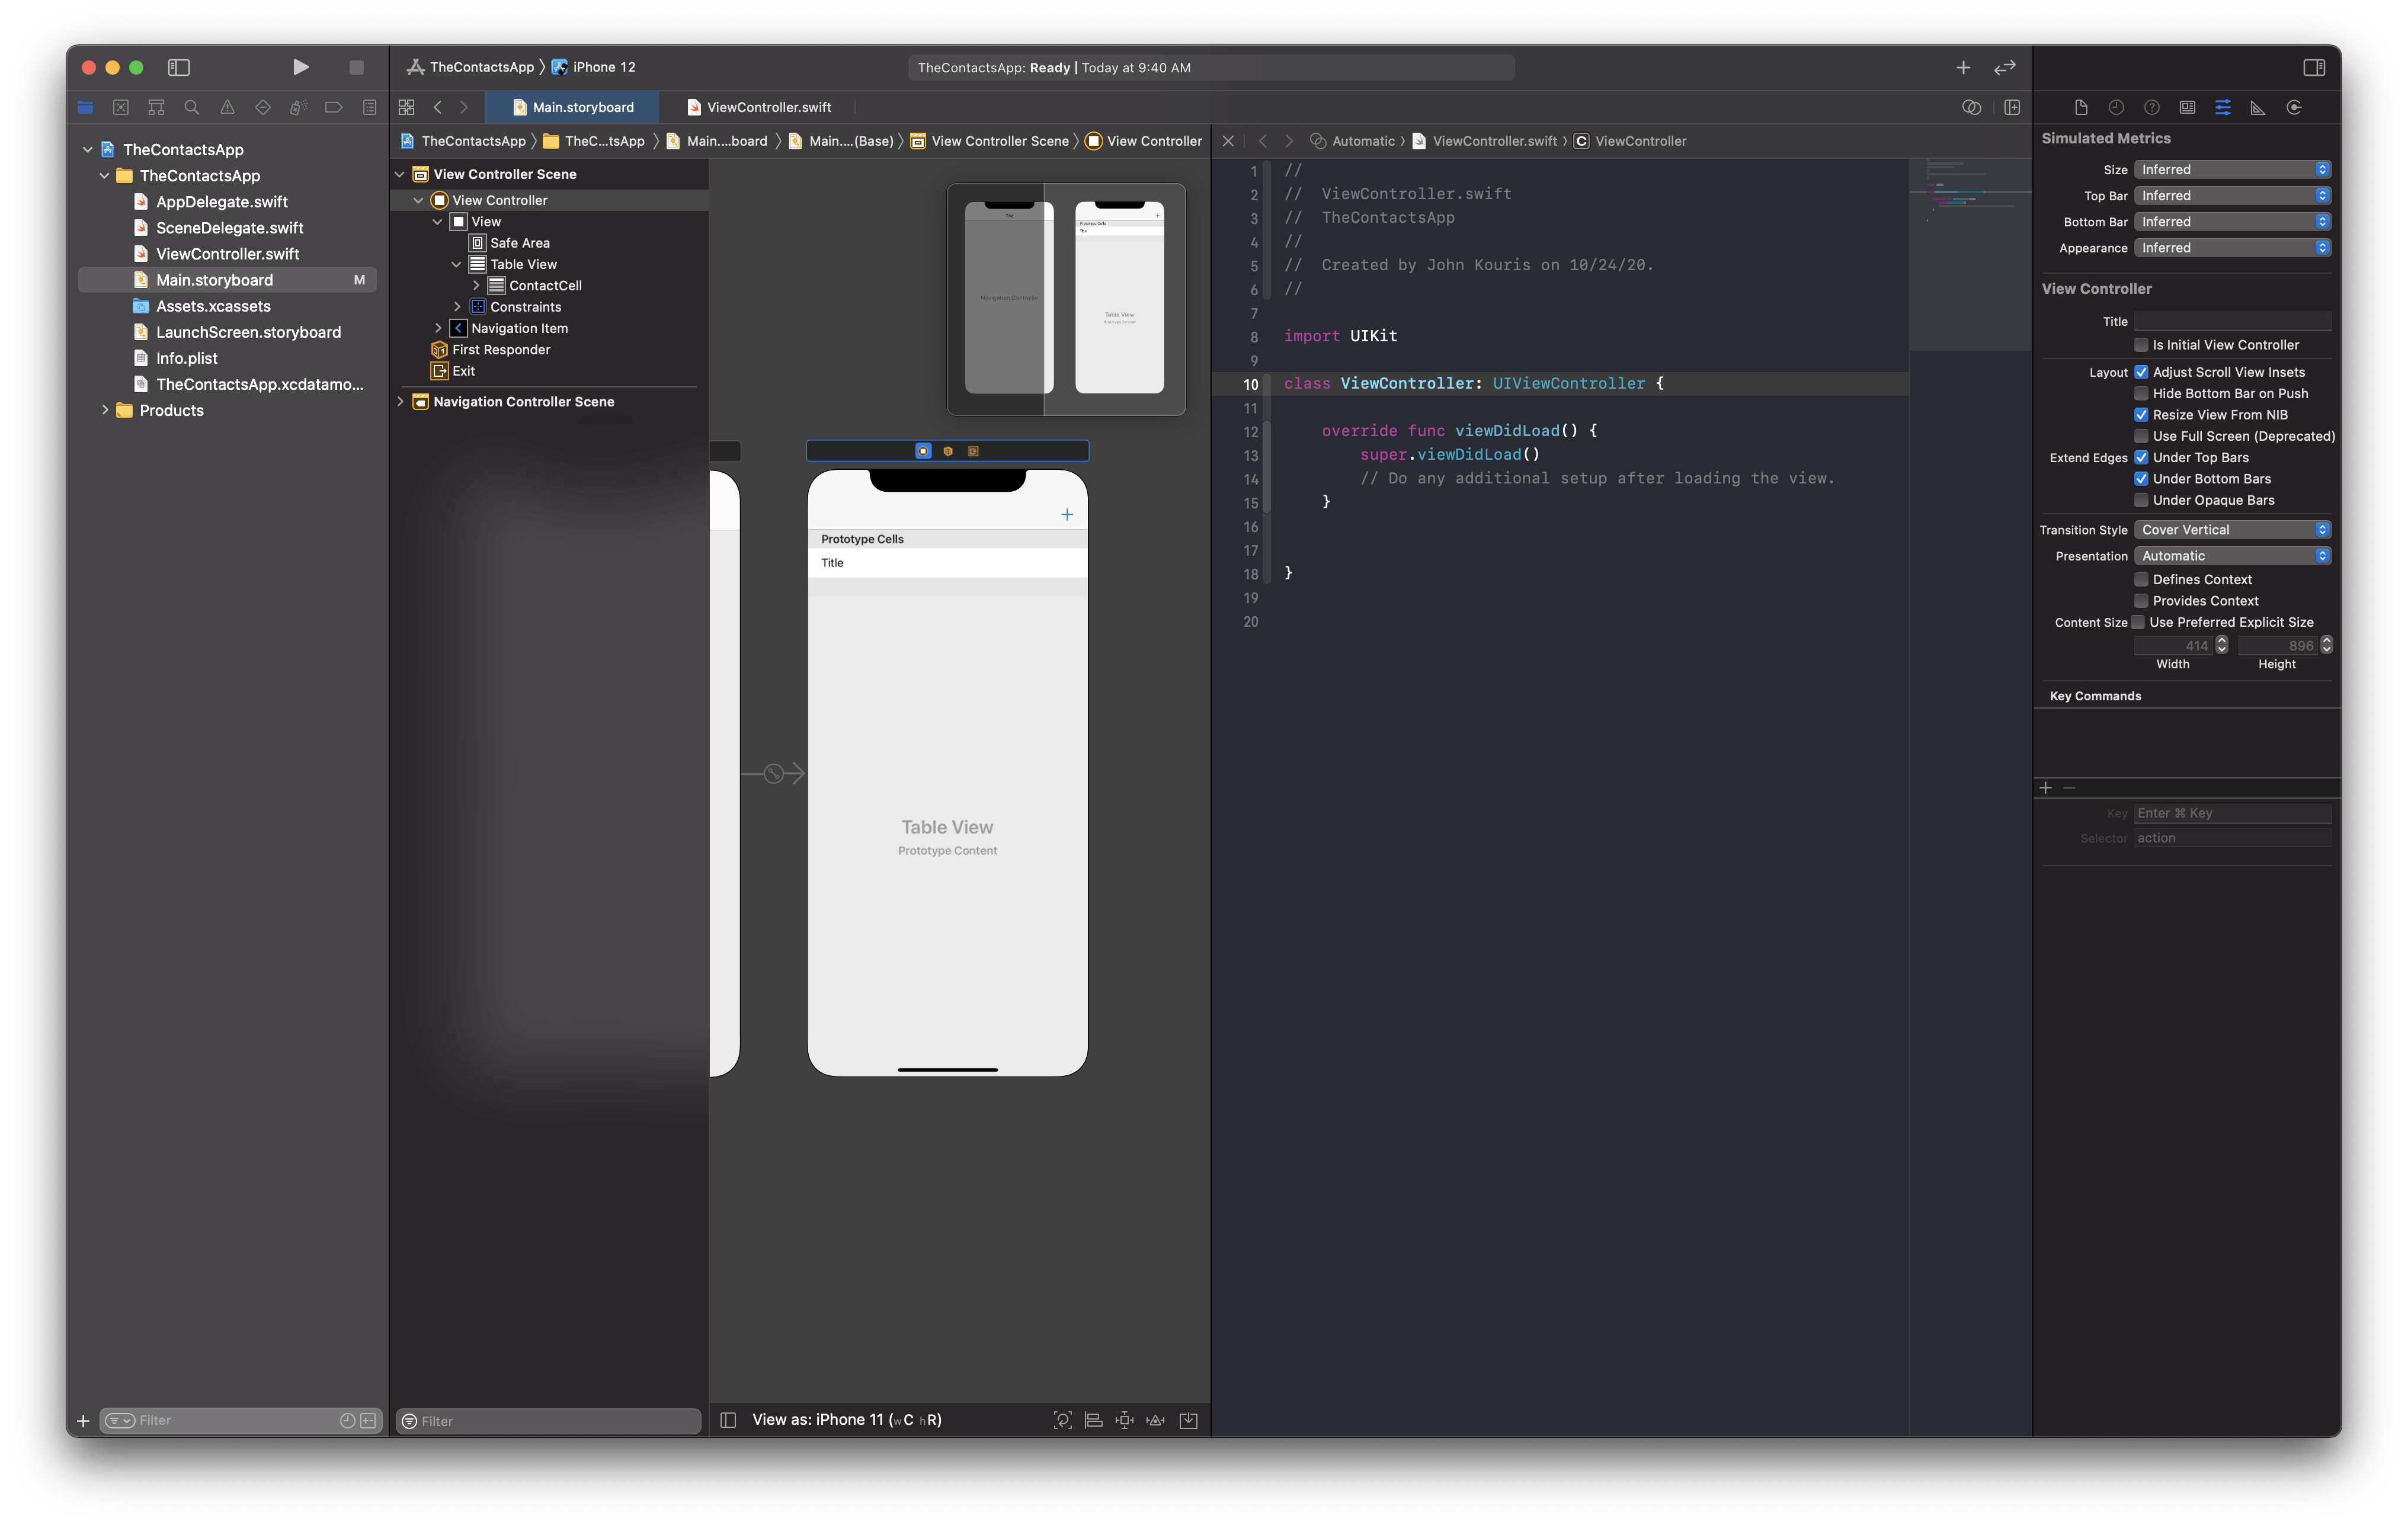
Now that we have both of our editors working, we are going to control drag from the Table View and the Add in our Document Outline. What does control drag mean? I want you to hold down the control button, click and hold on the Table View, and drag the blue line that appears into your ViewController.swift file. Position your mouse above the line override func viewDidLoad() { and release. You will see a popup appear once you release your mouse button. This is what it should look like:
In the popup that appears, enter the name contactsTableView in the Name textfield. You are going to repeat this process for the Add button, except instead of positioning the blue line above the viewDidLoad() method, you will add it below the viewDidLoad() method. Xcode 12 is smart enough to make any outlet you create below the viewDidLoad() method an IBAction automatically. Enter the name of your action as addTapped. If done correctly, your ViewController.swift file should now look like this:
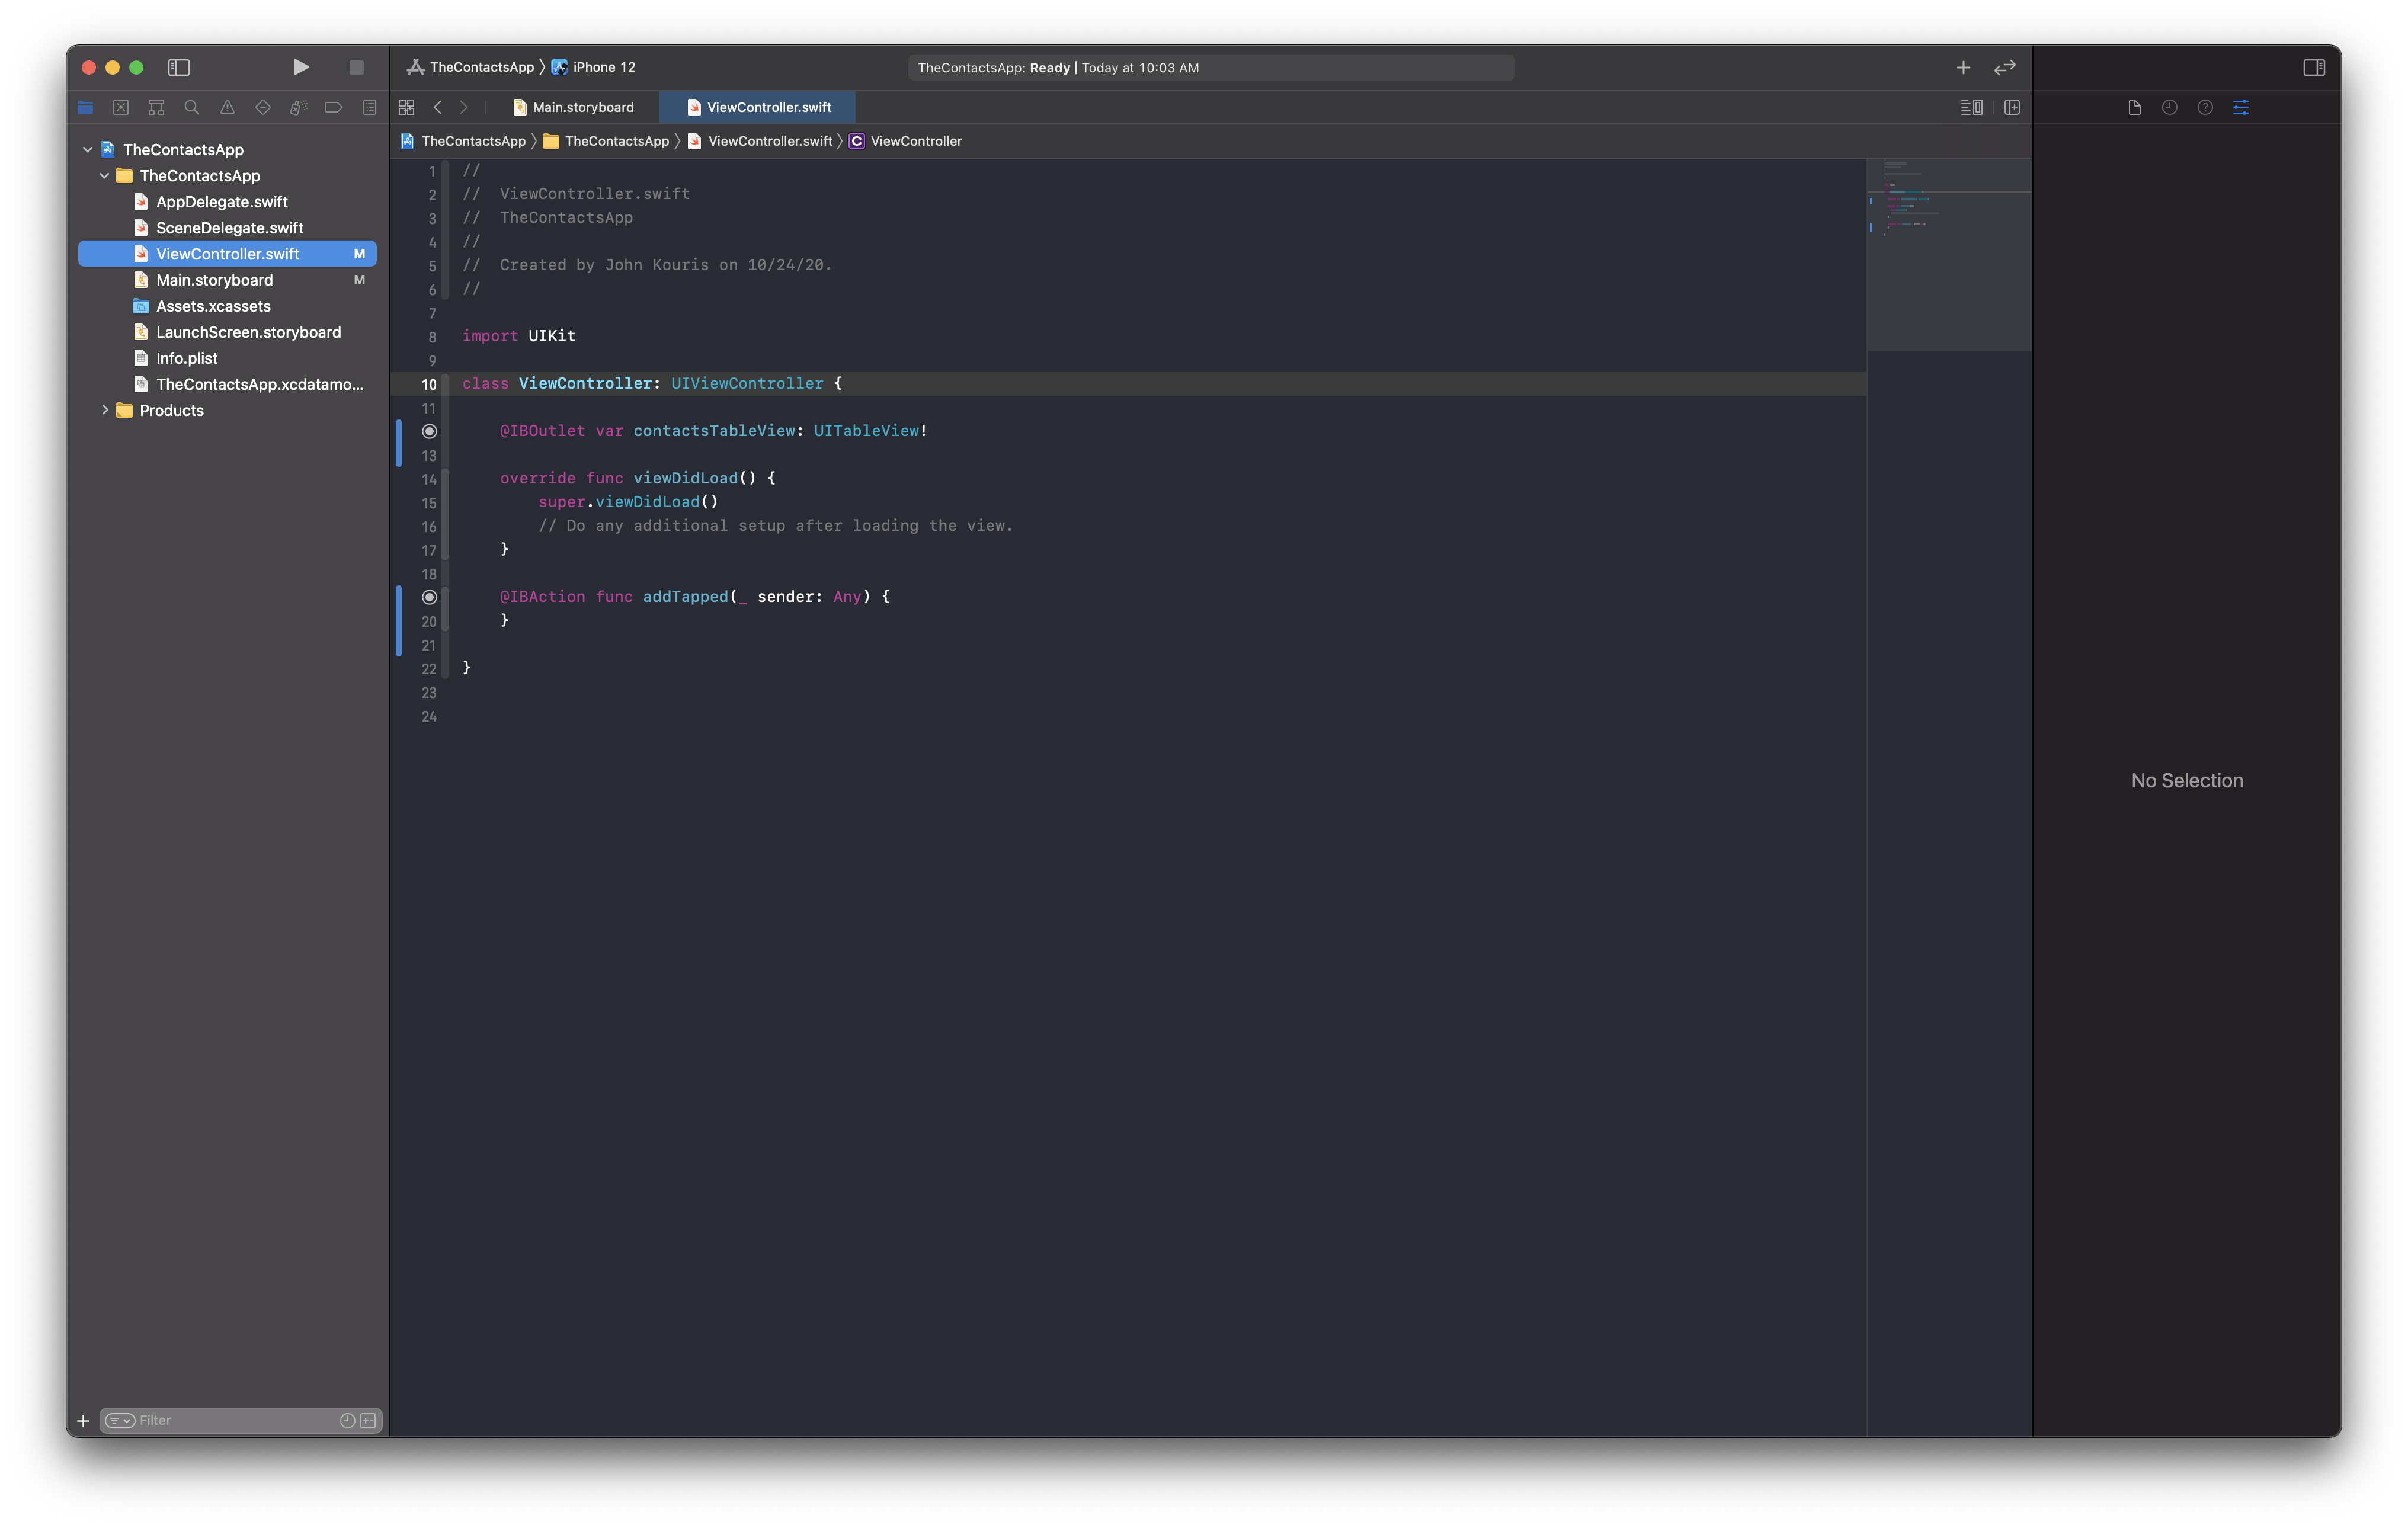
Note: don't worry about the M next to my files or the blue bars next to my lines of code. These are Xcode's ways of identifying the project is under Source Control, a topic for another day :)
Now, if you followed my Beginner Swift series you should already know how to declare variables and functions. But you may have noticed, we have IBOutlet in front of our contactsTableView property and IBAction in front of our addTapped method. What are these identifiers? IBOutlet and IBAction are simply Xcode's way of identifying properties or methods that are created using Interface Builder, the tool we have been using to create our UI and display our storyboard files.
Building the Table View
Our project is finally ready for us to start coding! In order to get our table view to start showing data, we need to set up our table view's protocols, UITableViewDelegate and UITableViewDataSource. If you take a look at the official Swift documentation, you can read that a Protocol in Swift is "a blueprint of methods, properties, and other requirements that suit a particular task or piece of functionality." What this means for us as iOS developers is we need to conform to these protocols in order to get our Table View to work. Modify your viewDidLoad() method to the following:
override func viewDidLoad() {
    super.viewDidLoad()

    contactsTableView.delegate = self
    contactsTableView.dataSource = self
}
The two lines of code we added to our viewDidLoad() method tell Xcode that we want our ViewController to act as the delegate and the dataSource for our contactsTableView. So, what is the delegate and what is the dataSource? If you didn't know already, Xcode has Swift documentation already built-in! To test this out, hold down the option button and click on the delegate. Check out the popup that appears:
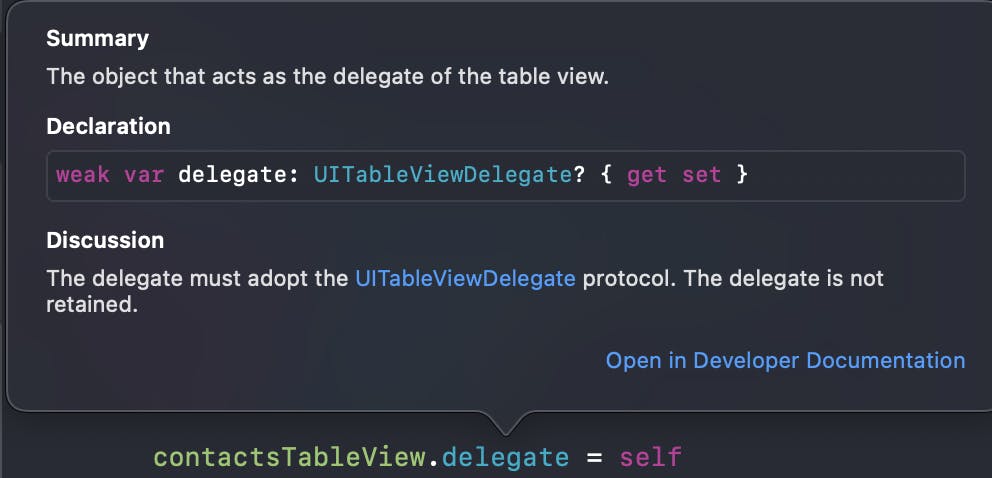
The documentation tells us that delegate is of type UITableViewDelegate and that we must adopt the UITableViewDelegate protocol. You can follow the same process to look up the documentation for the dataSource and you'll see that the data source must adopt the UITableViewDataSource protocol. More on how to do that in a moment, but first, a quick discussion on protocols and delegates.
A Quick Talk on Protocols and Delegates
As we discussed earlier, a protocol is a set of instructions we need to follow in order to implement a certain piece of functionality. A delegate is an object that is going to carry out those instructions. An easy way to think about the connection between protocols and delegates is to picture a manager and an intern: The manager comes up with a set of instructions (a protocol) and gives those instructions to the intern (the delegate). The manager doesn't necessarily care about how the intern carries out the instructions, just as long as the instructions get completed. Very similar to what we are going to do with our Table View's protocols and delegates - the Table View has defined a set of instructions we need to complete and our View Controller is going to carry out those instructions.
With that talk out of the way, let's implement the UITableViewDelegate and the UITableViewDataSource!
Back to Implementing the Table View
We are going to add our UITableViewDelegate and UITableViewDataSource in an extension. An extension simply extends the functionality of an existing class and is a good way to keep your code organized. Add the following code to the end of your ViewController.swift file:
extension ViewController: UITableViewDelegate, UITableViewDataSource {

    func tableView(_ tableView: UITableView, numberOfRowsInSection section: Int) -> Int {

    }

    func tableView(_ tableView: UITableView, cellForRowAt indexPath: IndexPath) -> UITableViewCell {

    }

}
You'll get some errors, but don't worry, we'll fix them in a moment. First, let me explain what these two methods are doing. The first is the method that will determine how many rows get added to our table view. Notice, we will return an Int from this first method. The second is how we create those rows using cells. Notice, we are going to return a UITableViewCell from the second method.
Now that you know what these methods do, let's fix those errors. Modify the table view methods to the following:
func tableView(_ tableView: UITableView, numberOfRowsInSection section: Int) -> Int {
    return 10
}

func tableView(_ tableView: UITableView, cellForRowAt indexPath: IndexPath) -> UITableViewCell {
    let cell = tableView.dequeueReusableCell(withIdentifier: "ContactCell", for: indexPath)
    cell.textLabel?.text = "hi"
    return cell
}
So what have we just done? In the numberOfRowsInSection method, we are just returning the number 10. We are telling the table view that we want to have exactly 10 rows in our table view (we'll make this more dynamic in a moment).
Our cellForRowAt method is a little more complicated, so let's walk through it line-by-line:
let cell = tableView.dequeueReusableCell(withIdentifier: "ContactCell", for: indexPath). We are calling the methoddequeueReusableCellon the tableView. If you option-click on this method you can read that it "returns a reusable table-view cell object for the specified reuse identifier and adds it to the table." In iOS, table views reuse their cells once they scroll off the screen so that scrolling can be quick and efficient, regardless of the number of cells in the table view. If you notice, we are using the identifier,ContactCell, that we created in our storyboard. Be sure to enter the identifier exactly as it appears in your storyboard, else it will not work. Finally, the indexPath represents the location of an item in an array (more on this in a moment).cell.textLabel?.text = "hi"is setting thetextproperty of ourtextLabelin each cell to the word, "hi." This is what we are going to see in each cell of the table view when we run our app.- Finally, you should know what the final line does - it returns the cell that we just created so we can use it in our table view.
Once you make these changes, you will be able to run your project and see something on the simulator! To run your project, make sure you have a simulator type selected in the toolbar (in my case, iPhone 12), then click on the sideways carrot pictured below. You can also use the keyboard shortcut command + r.

You should see a new application open on your computer called Simulator. Once it loads, the simulator should look like the following:
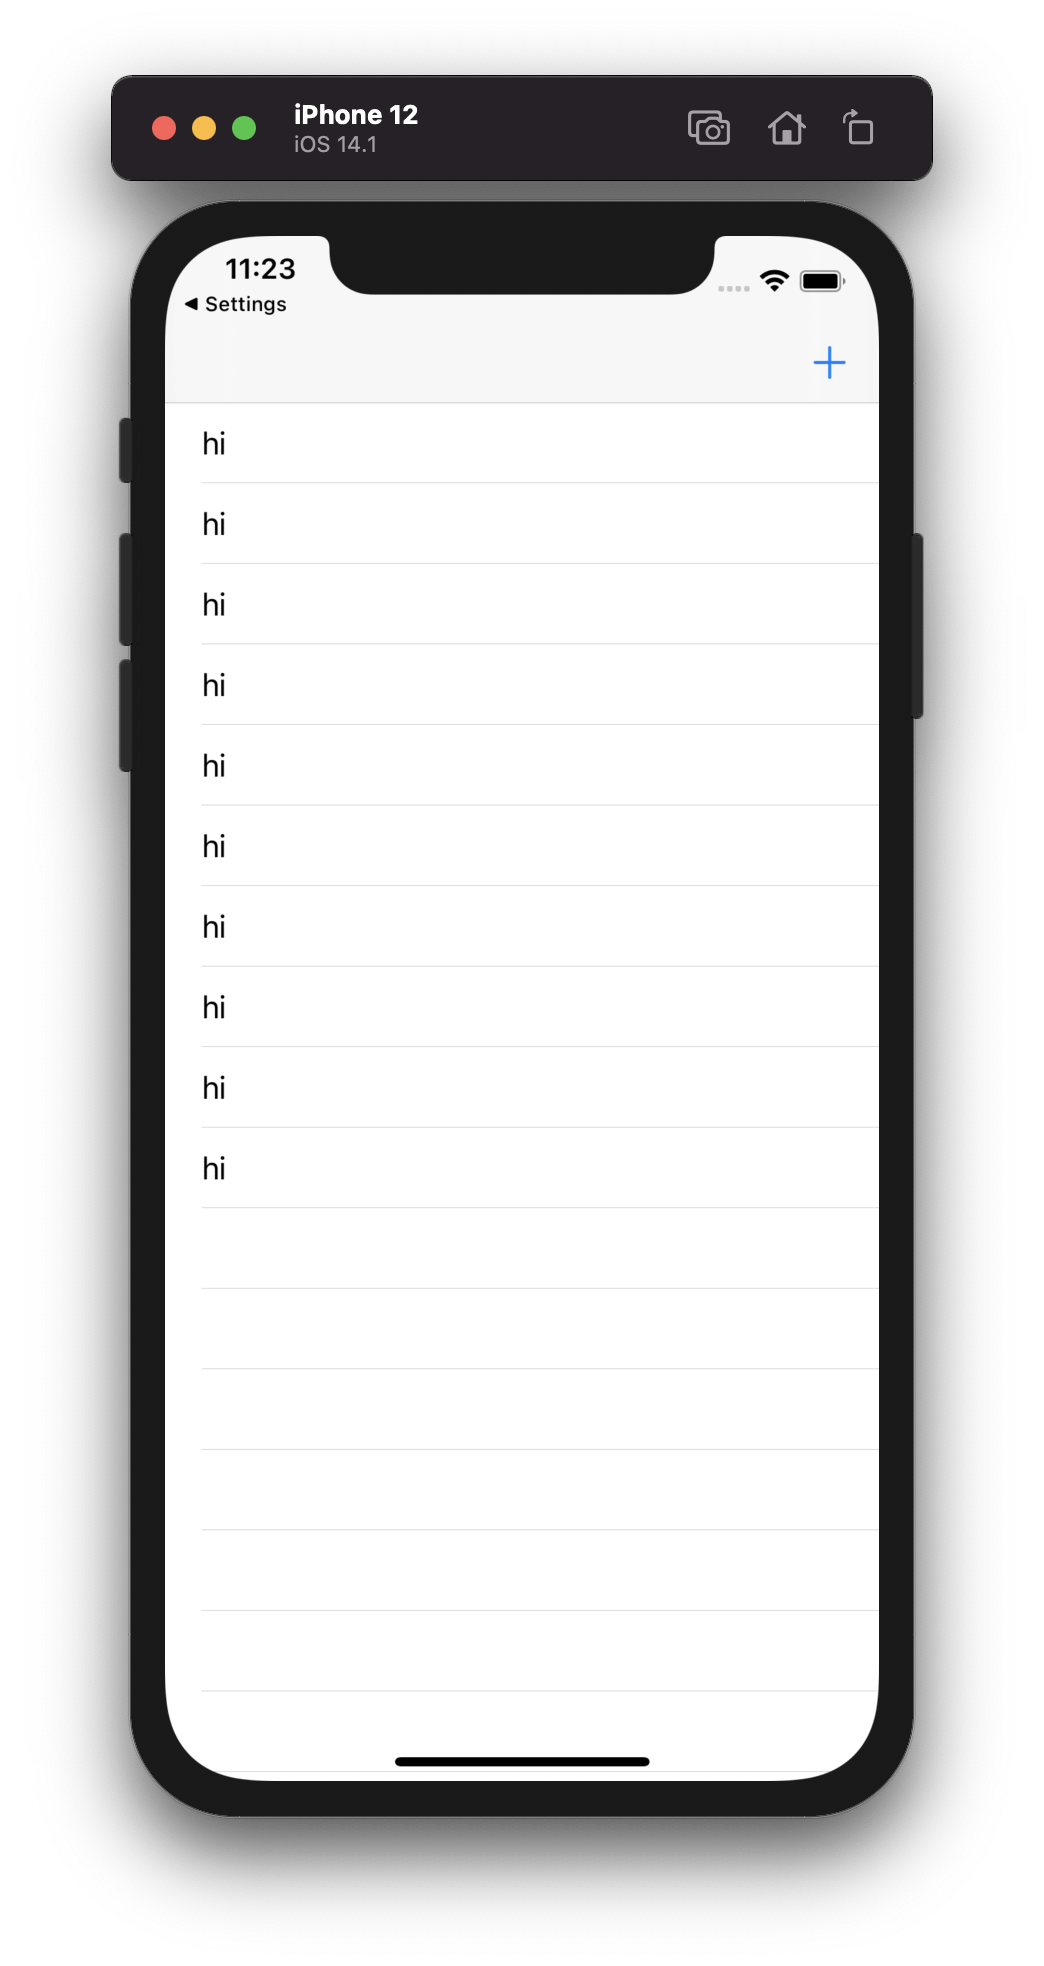
This is so exciting! You finally have an app running! Is it a useful app? No. But just look at how much you have accomplished already! The last thing we are going to do for this post is make our table view a little more interesting by loading in an array of names, as opposed to just showing "hi" over-and-over.
To get started, add the following property right below your IBOutlet:
let contacts = ["John", "Jim", "Aly", "Allison", "Bob", "Will", "Conner", "Jeff", "Marissa", "Kevin"]
So, what is this new constant and why are the names surrounded by []. This is how we create an array in Swift. If we look at the official Swift documentation, we see that an array "stores values of the same type in an ordered list."
We are going to use our new contacts array to populate our contactsTableView. Change the return 10 in numberOfRowsInSection method to:
return contacts.count
Option-clicking on the count property we can see that it is "the number of elements in the array." With this change, we are returning as many rows as there are elements in the contacts array.
Finally, change the second line of the cellForRowAt method to:
cell.textLabel?.text = contacts[indexPath.row]
With this change we are going to display the names that we entered in the contacts array. We can access any element in an array by using subscript syntax. We just need to pass the index of the item we want to access. In general, the syntax looks like array[index]. Just remember, in Swift, we start counting the indexes of arrays starting with 0. That means, the first element in the contacts array ("John") has an index value of 0. The second element has an index value of 1. The third element has an index value of 2, and so on and so forth. The indexPath.row represents the value of the row element of the given index path. In plain English, give us the index of the row we are currently on, starting at 0.
Okay, with those two changes made, rerun your simulator. You should now see the following:
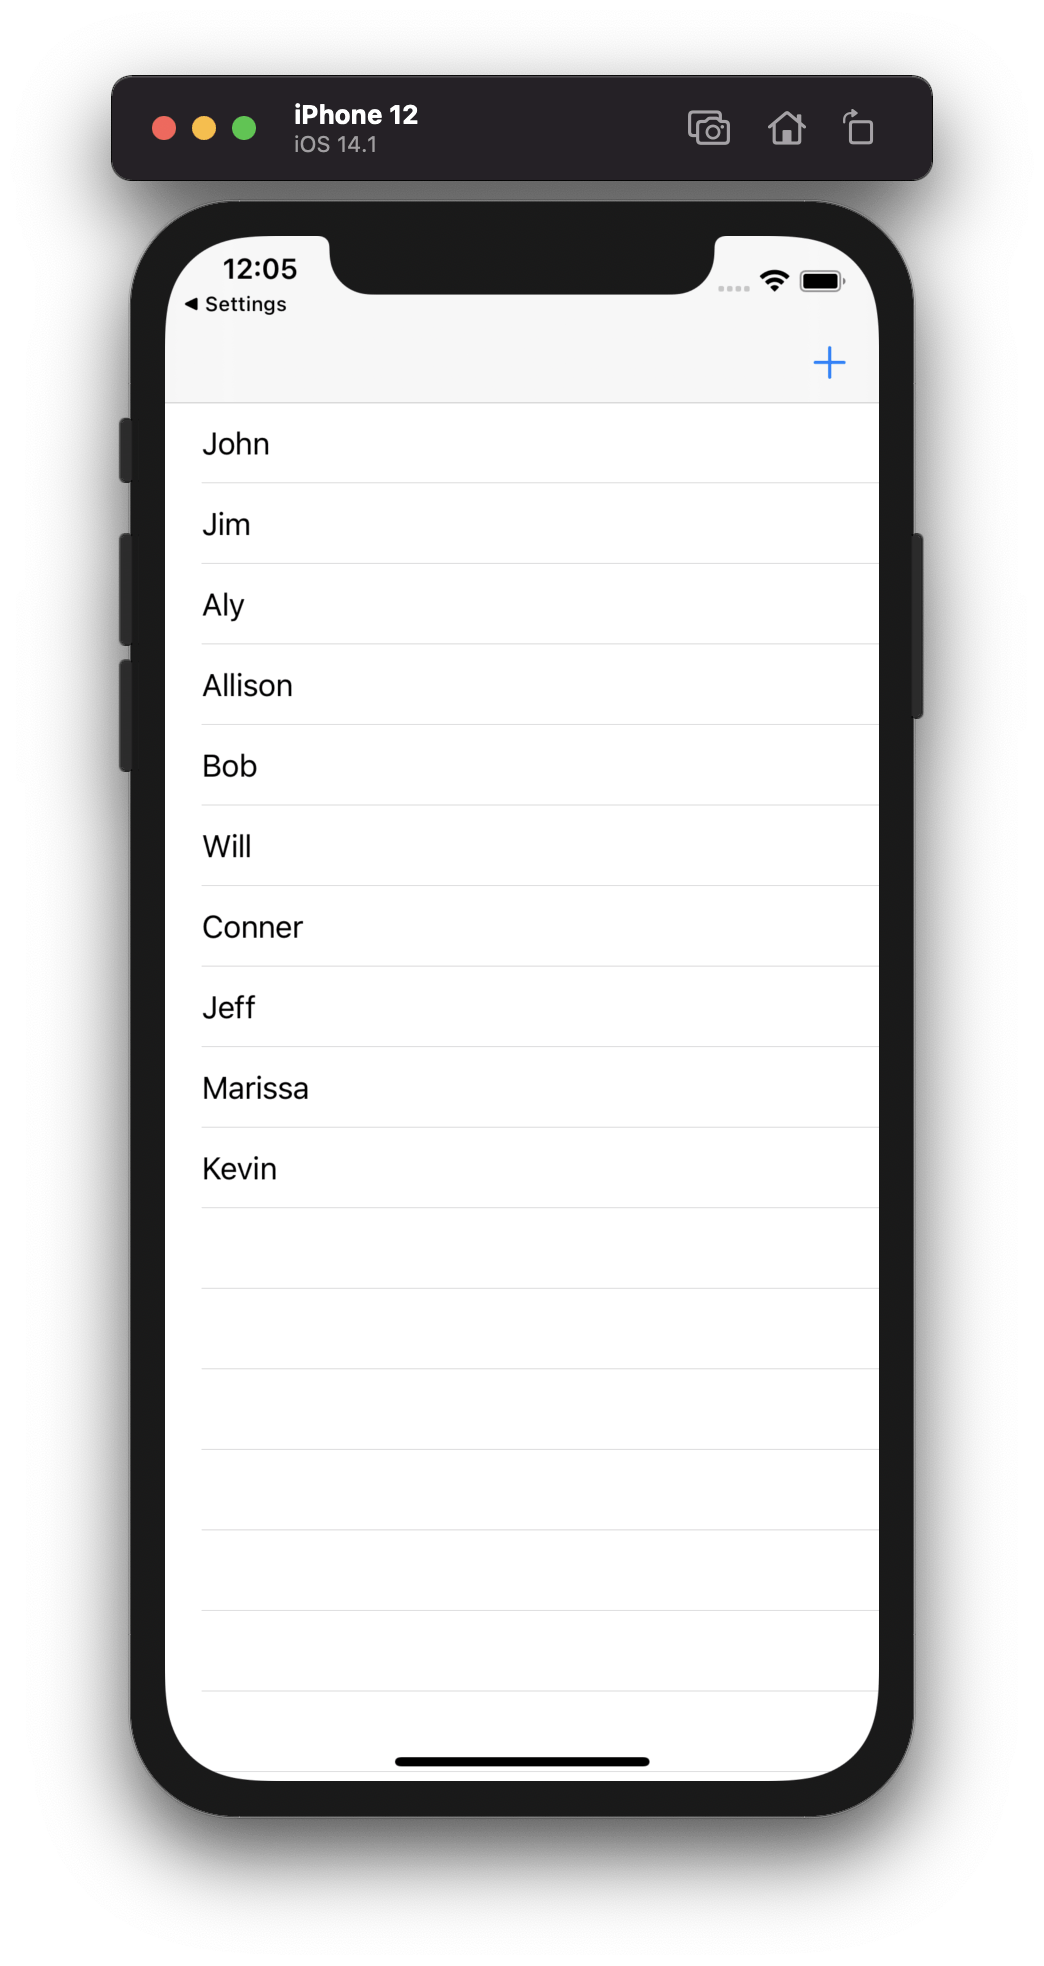
Look at that! We are now getting a list of names to appear in our table view.
Wrap Up
Congratulations on making it this far! You now have an app that can display names in a table view. Right now, we can only see names that we add to our array in code...not all that useful for actual users. In the next post, we are going to improve the usability of our application by allowing users to add and delete their own contacts.
Take some time to reflect on what you learned today. Try implementing the table view protocols on your own. The more you practice, the easier it is going to get.
Happy coding!