


In my last post, I promised that my next post would get into building applications for iOS. What can I say, I'm a man of my word. In this series, you will learn how to create the UI for your applications and apply what you've been learning during the Beginner Swift series to make a fully functioning iOS app.
The Contacts App
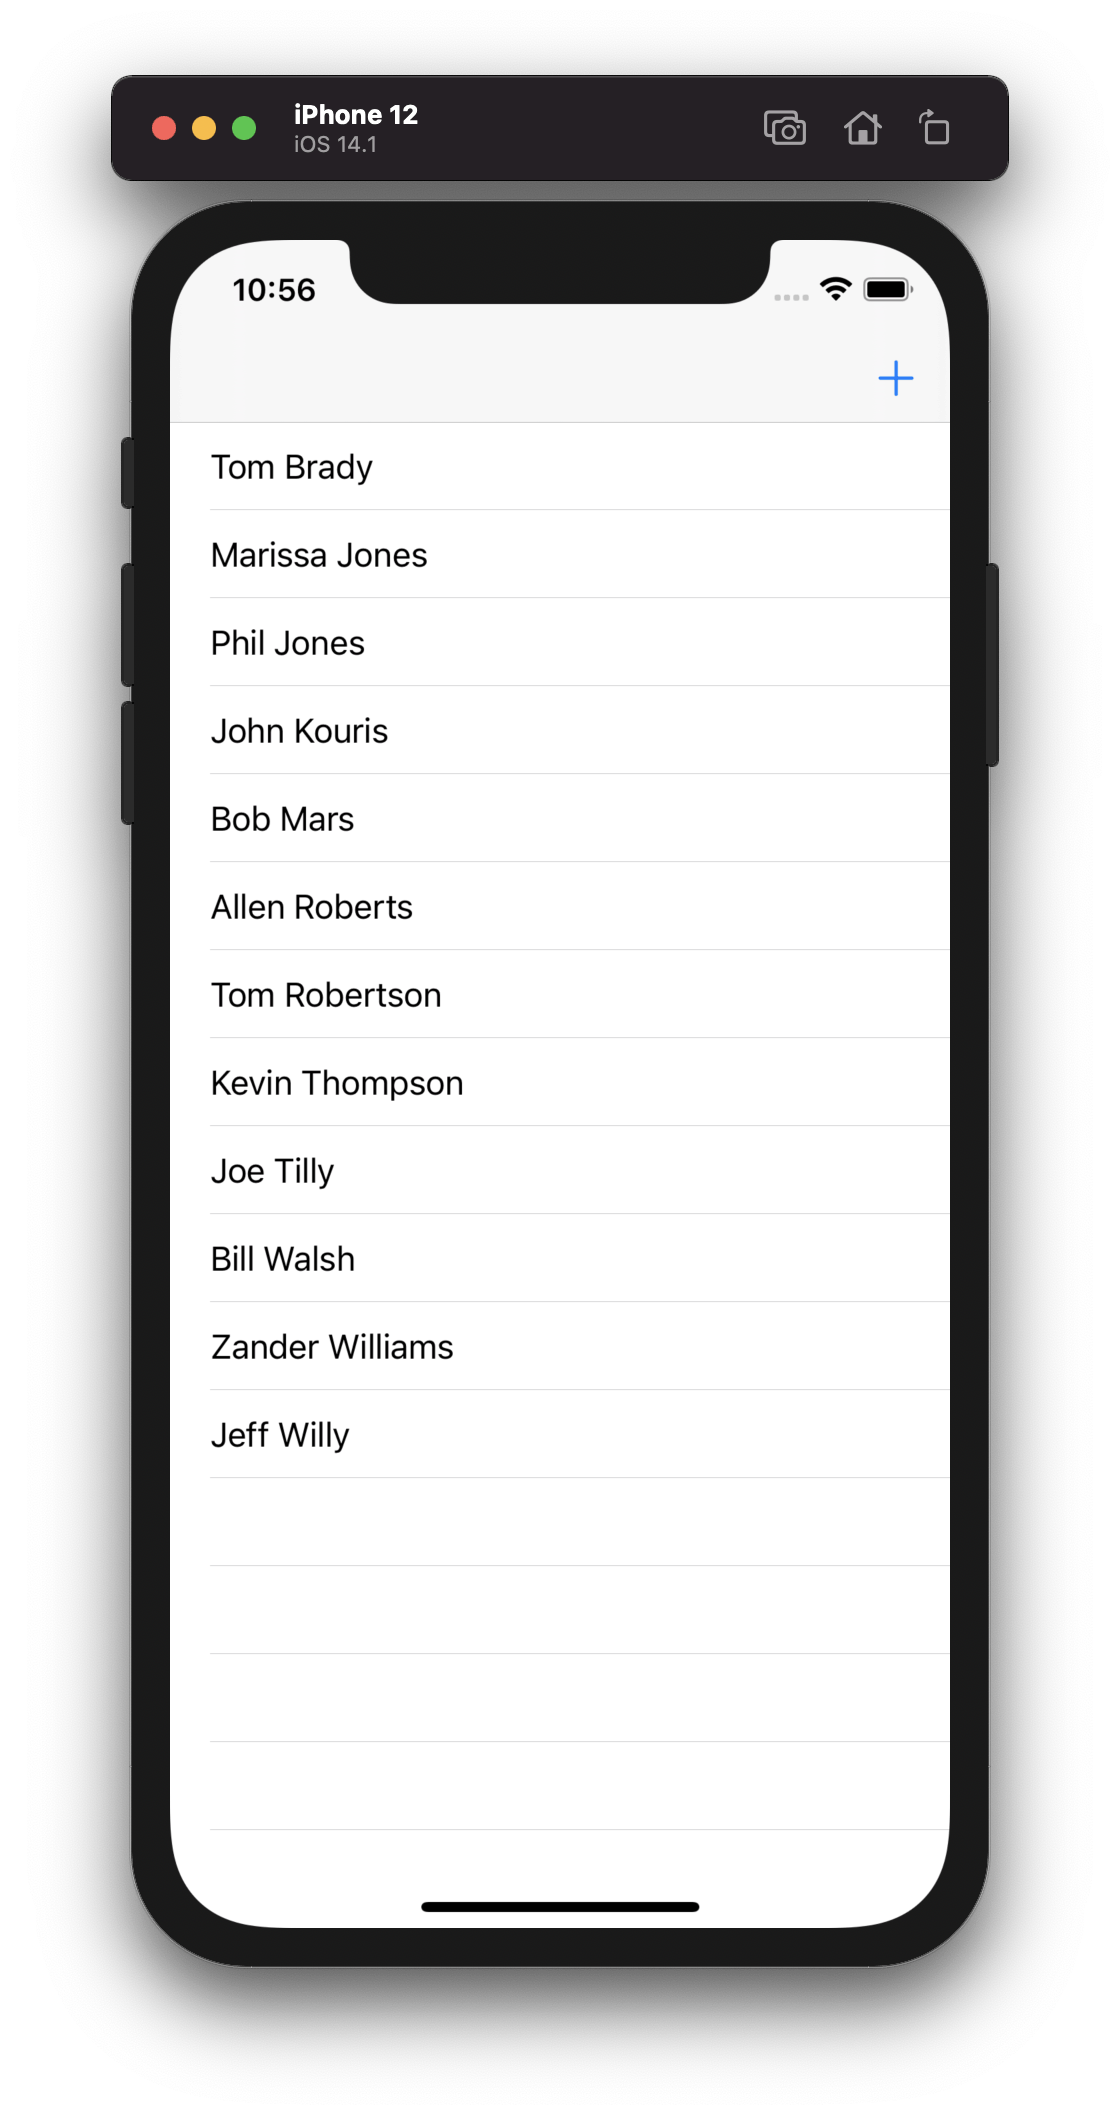
During this series, we are going to be developing a simple contacts list application. Users will be able to view all contacts, add new contacts, change existing contacts, and delete contacts. By the end of this series, you will have experience working with Table Views, for loops, delegates and protocols, and much more. By the end of this series, you will have an app that looks like this:
Getting Started
If you haven't already, launch Xcode. The first screen you should see is this one:
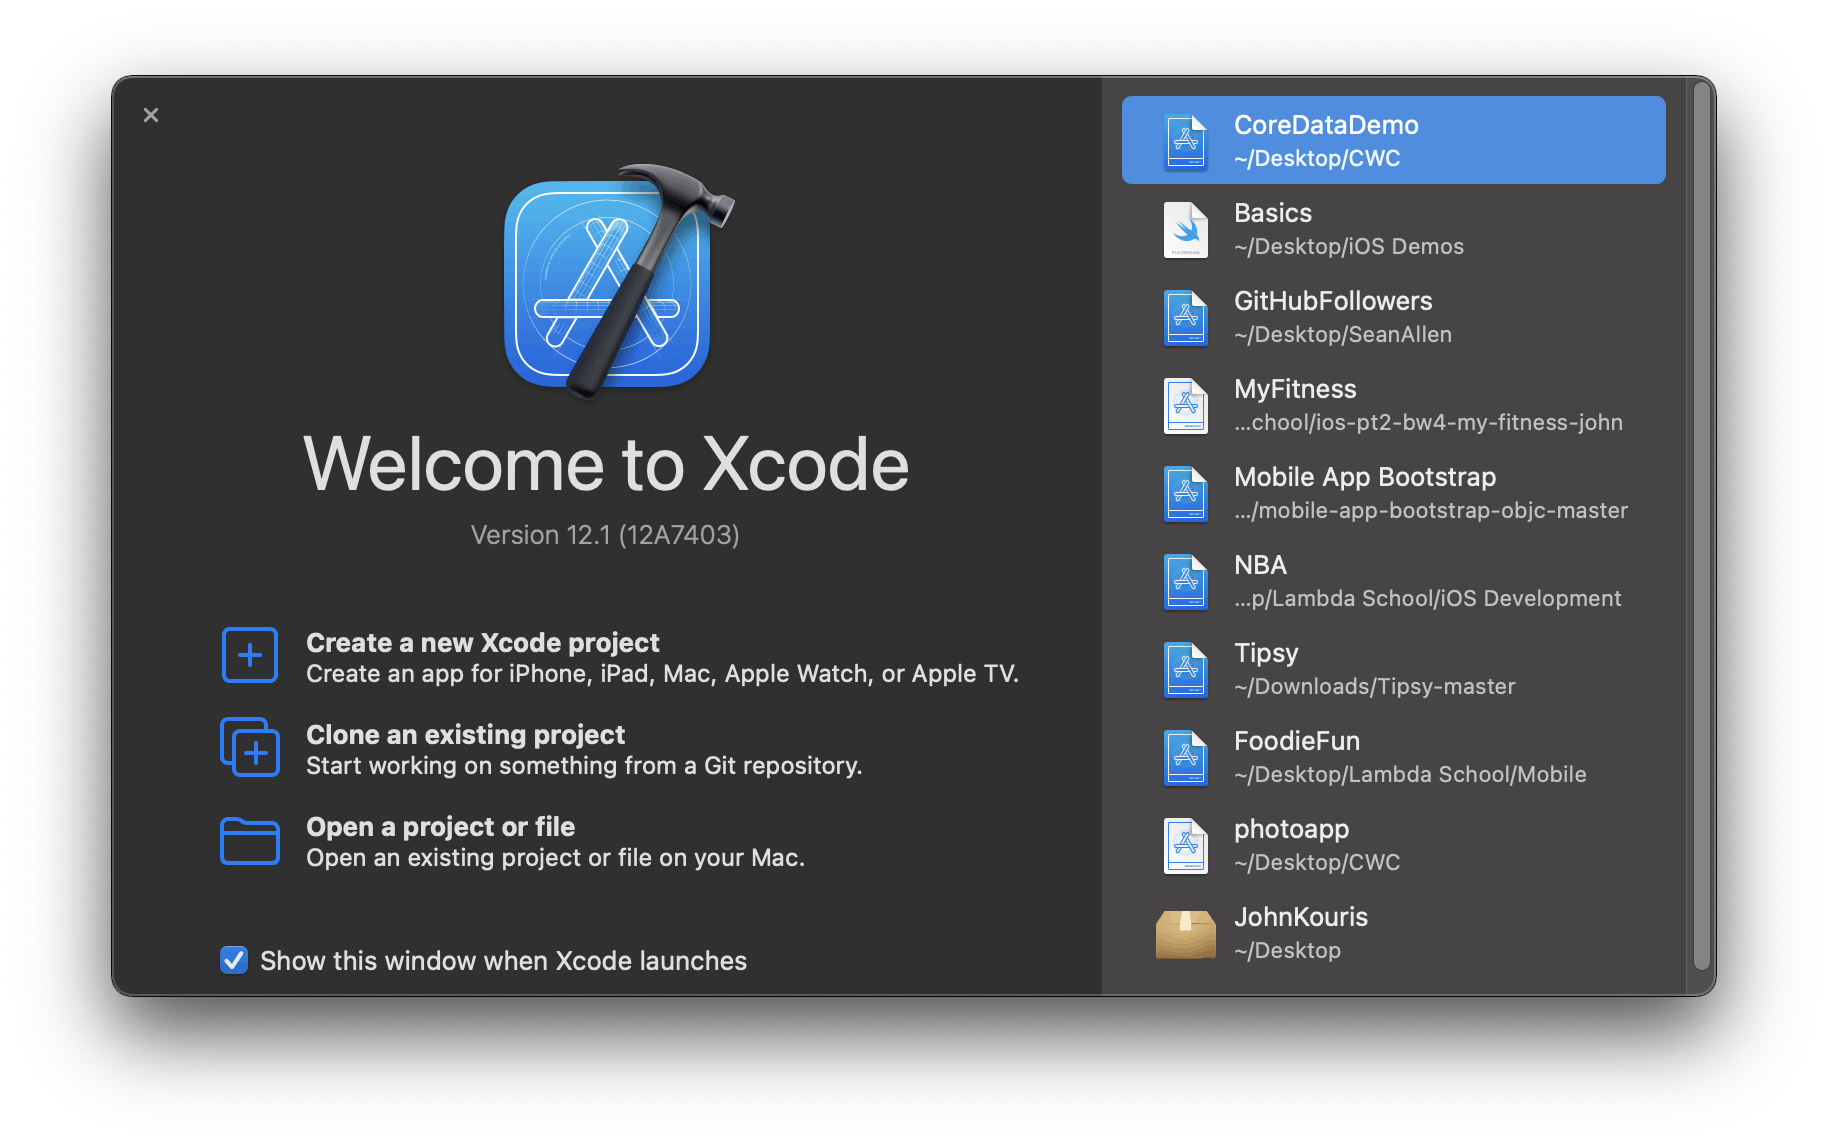
Notice, I am running Xcode version 12.1. Click on the line that says Create a new Xcode project.
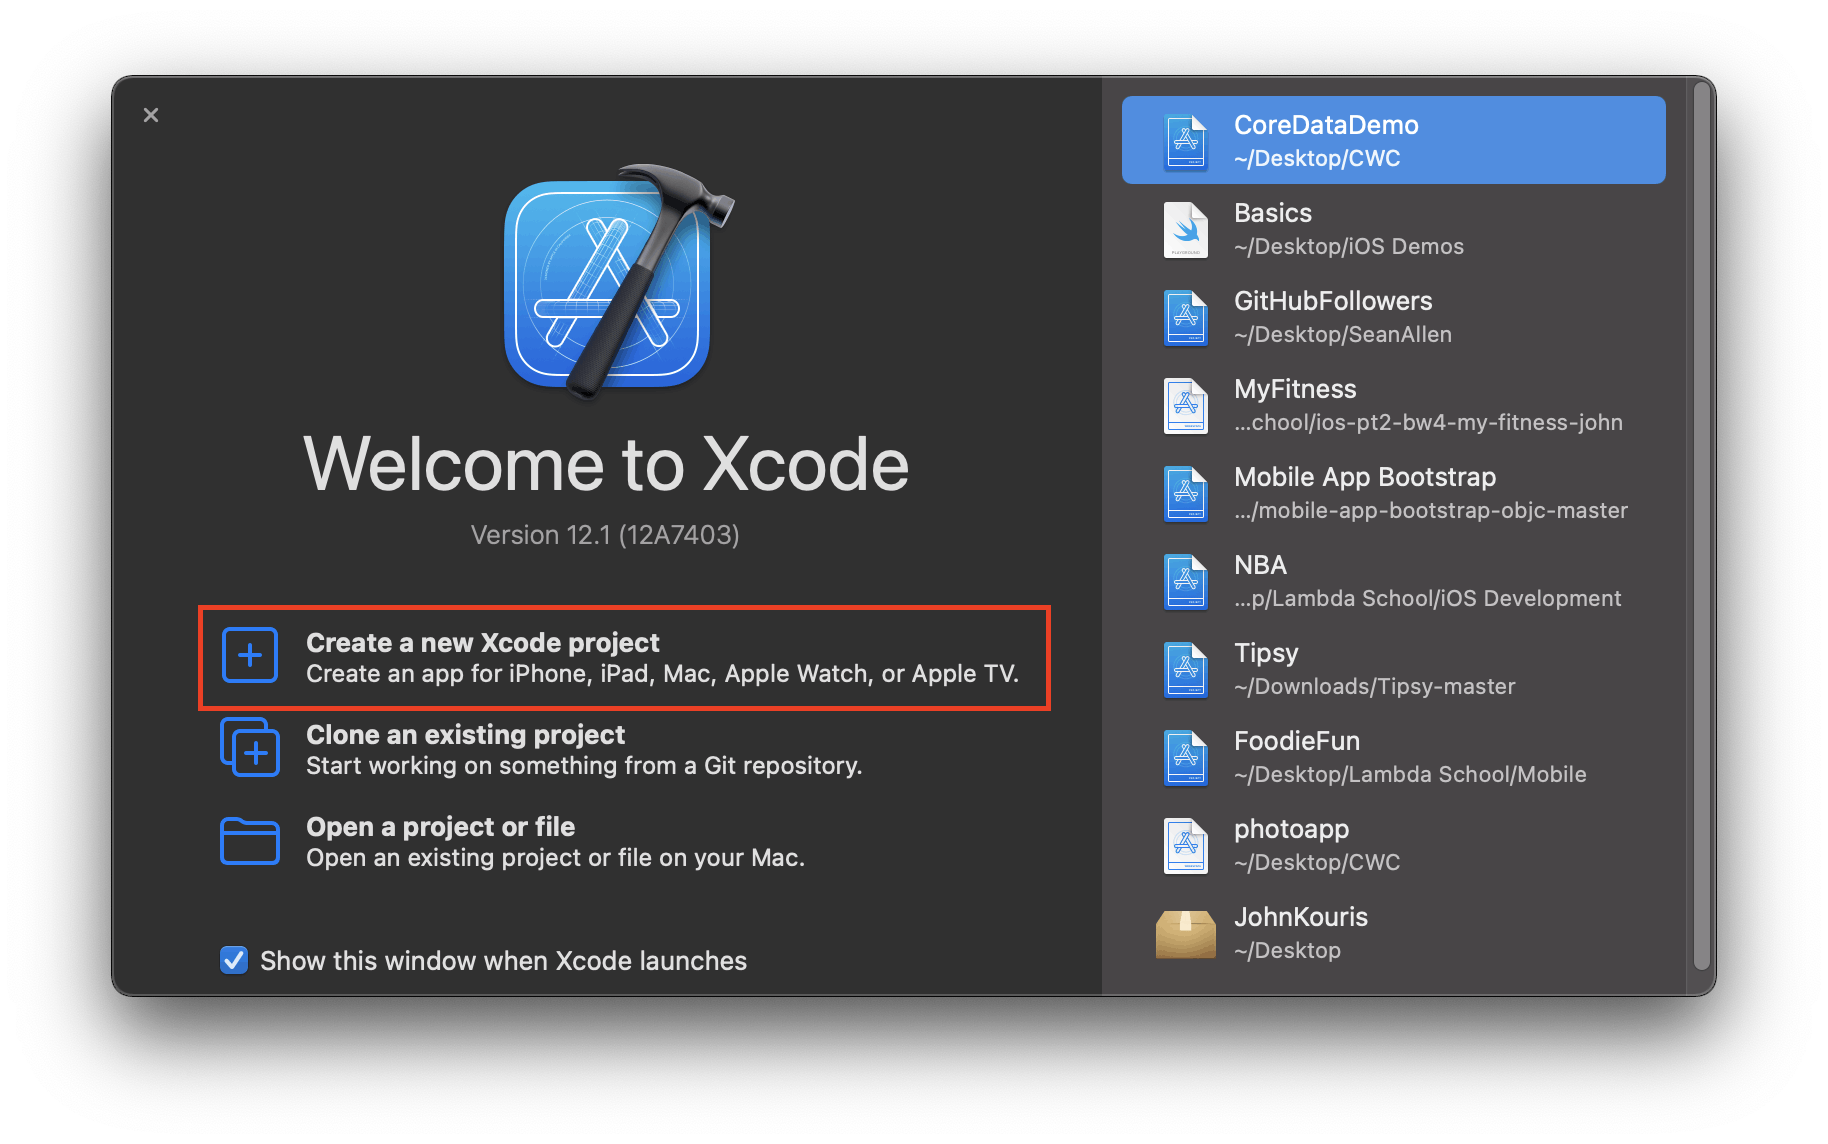
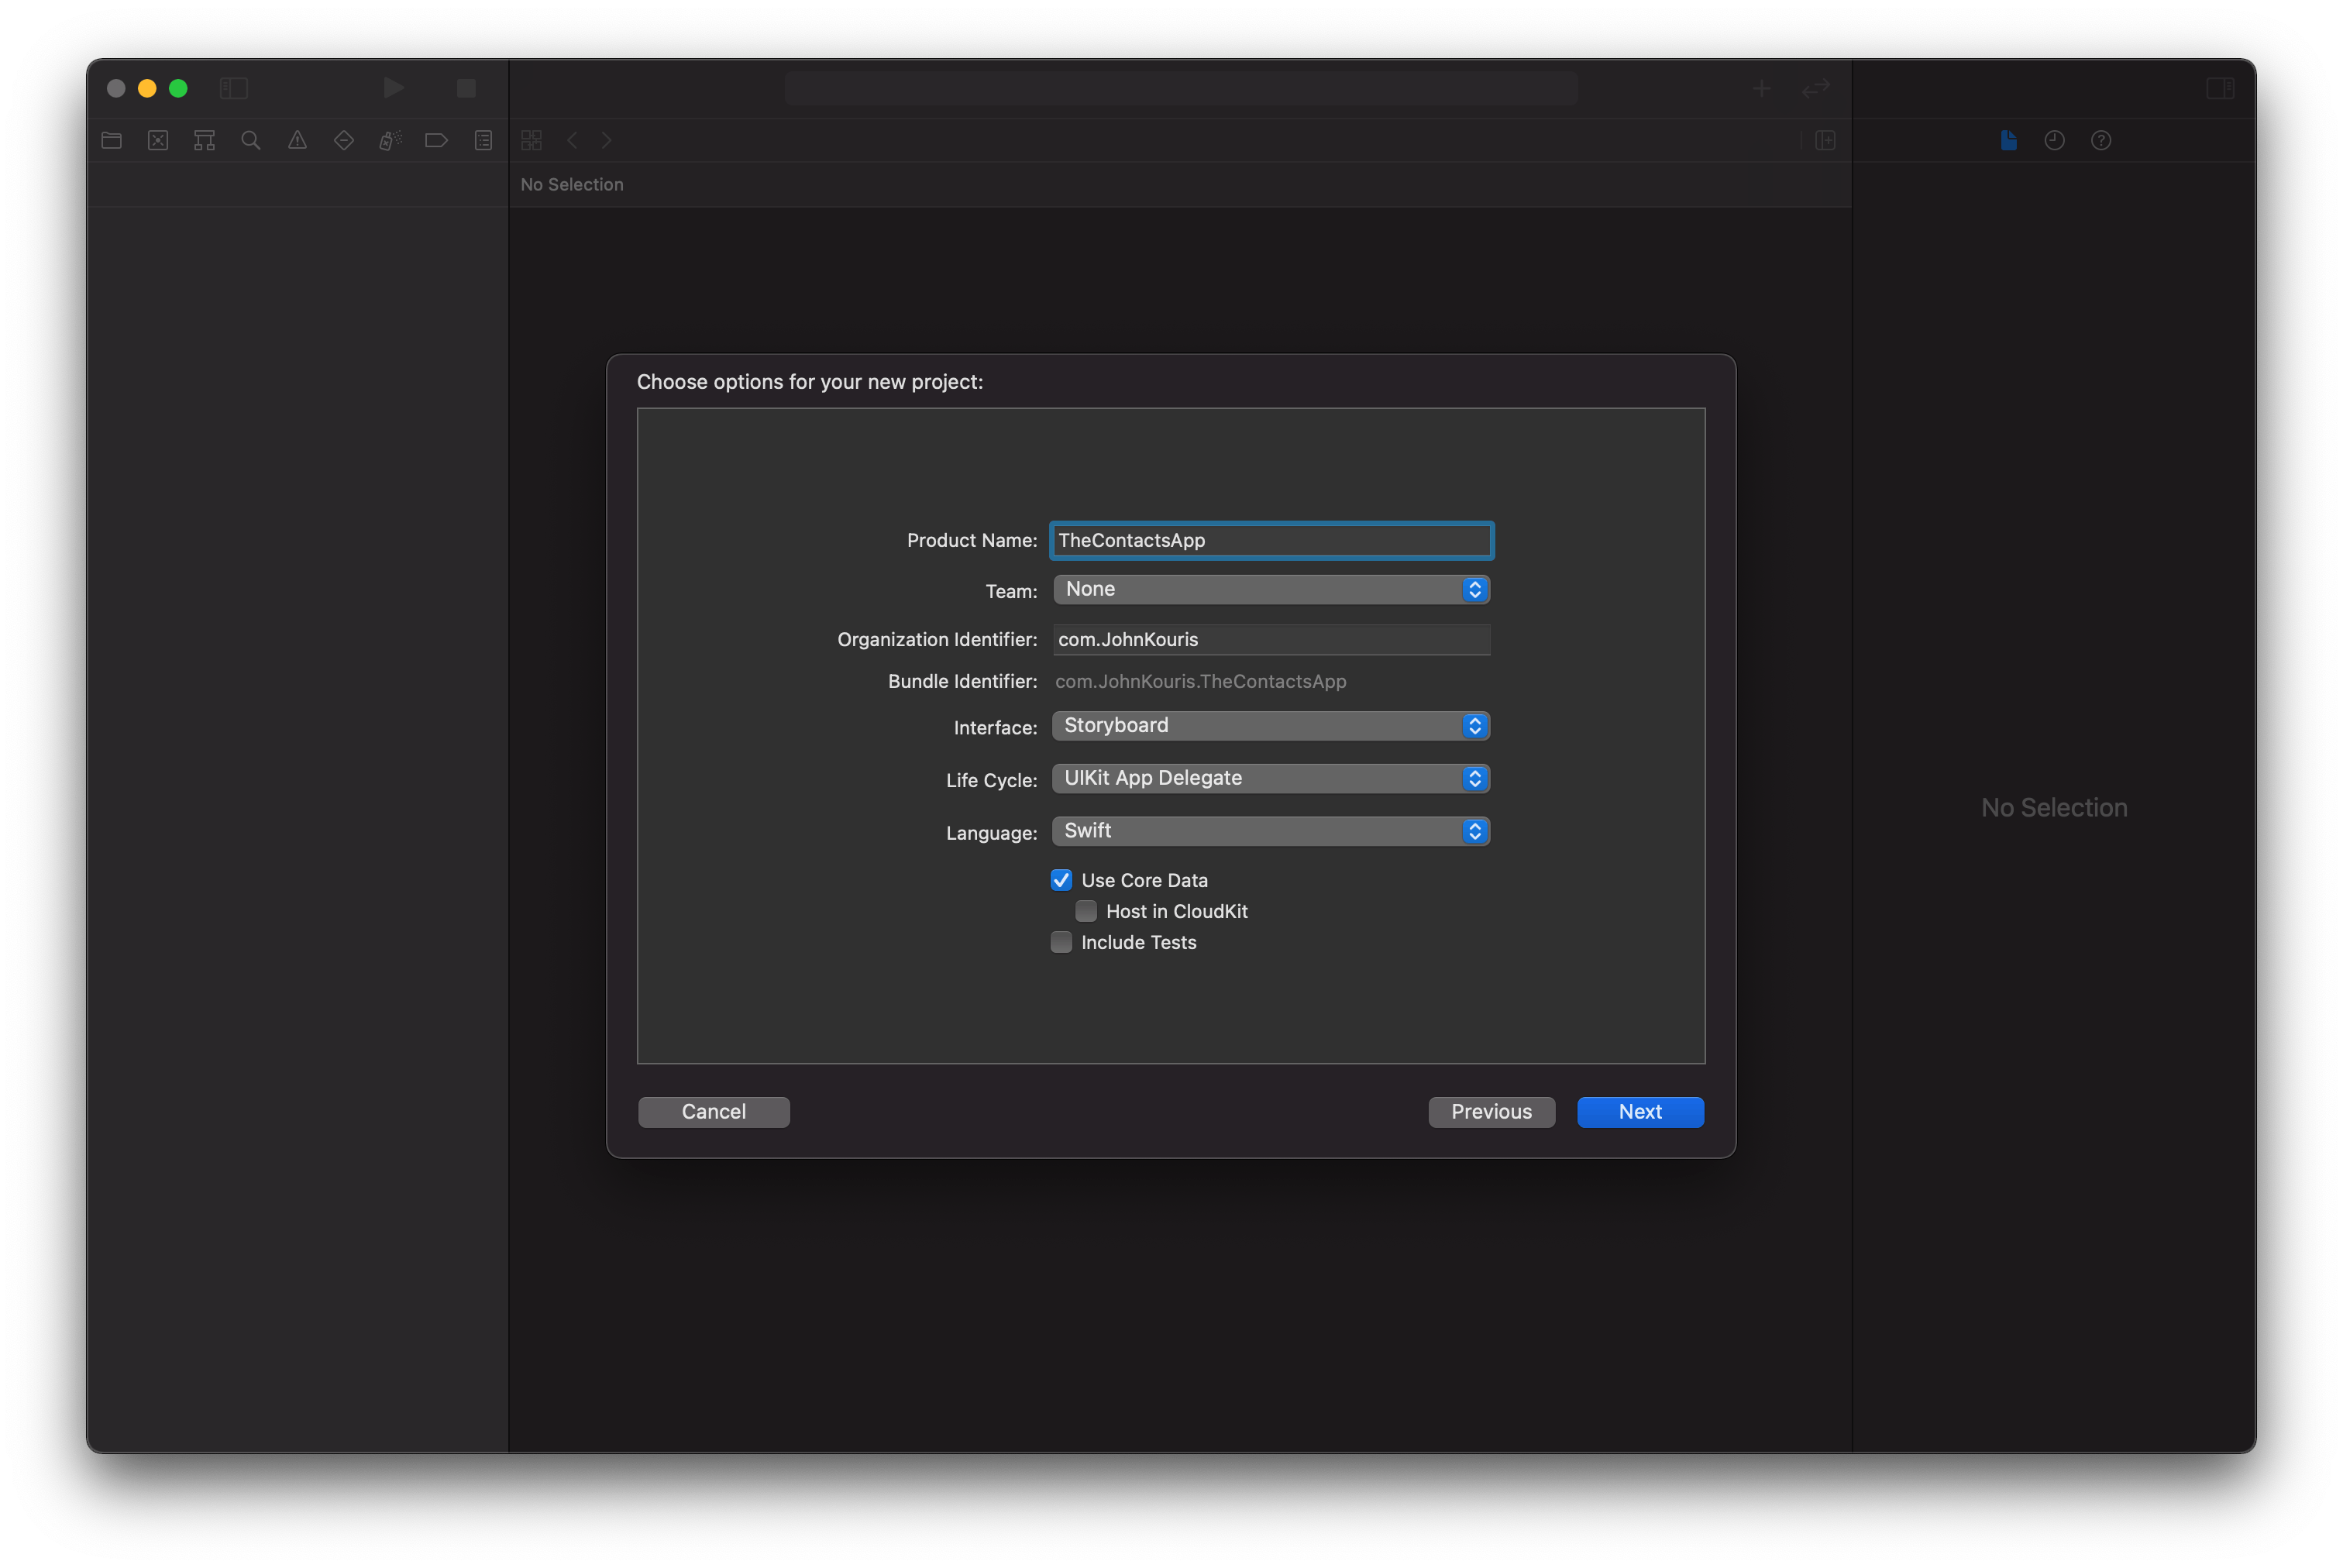
Once you do that, you will be taken to the following screen:
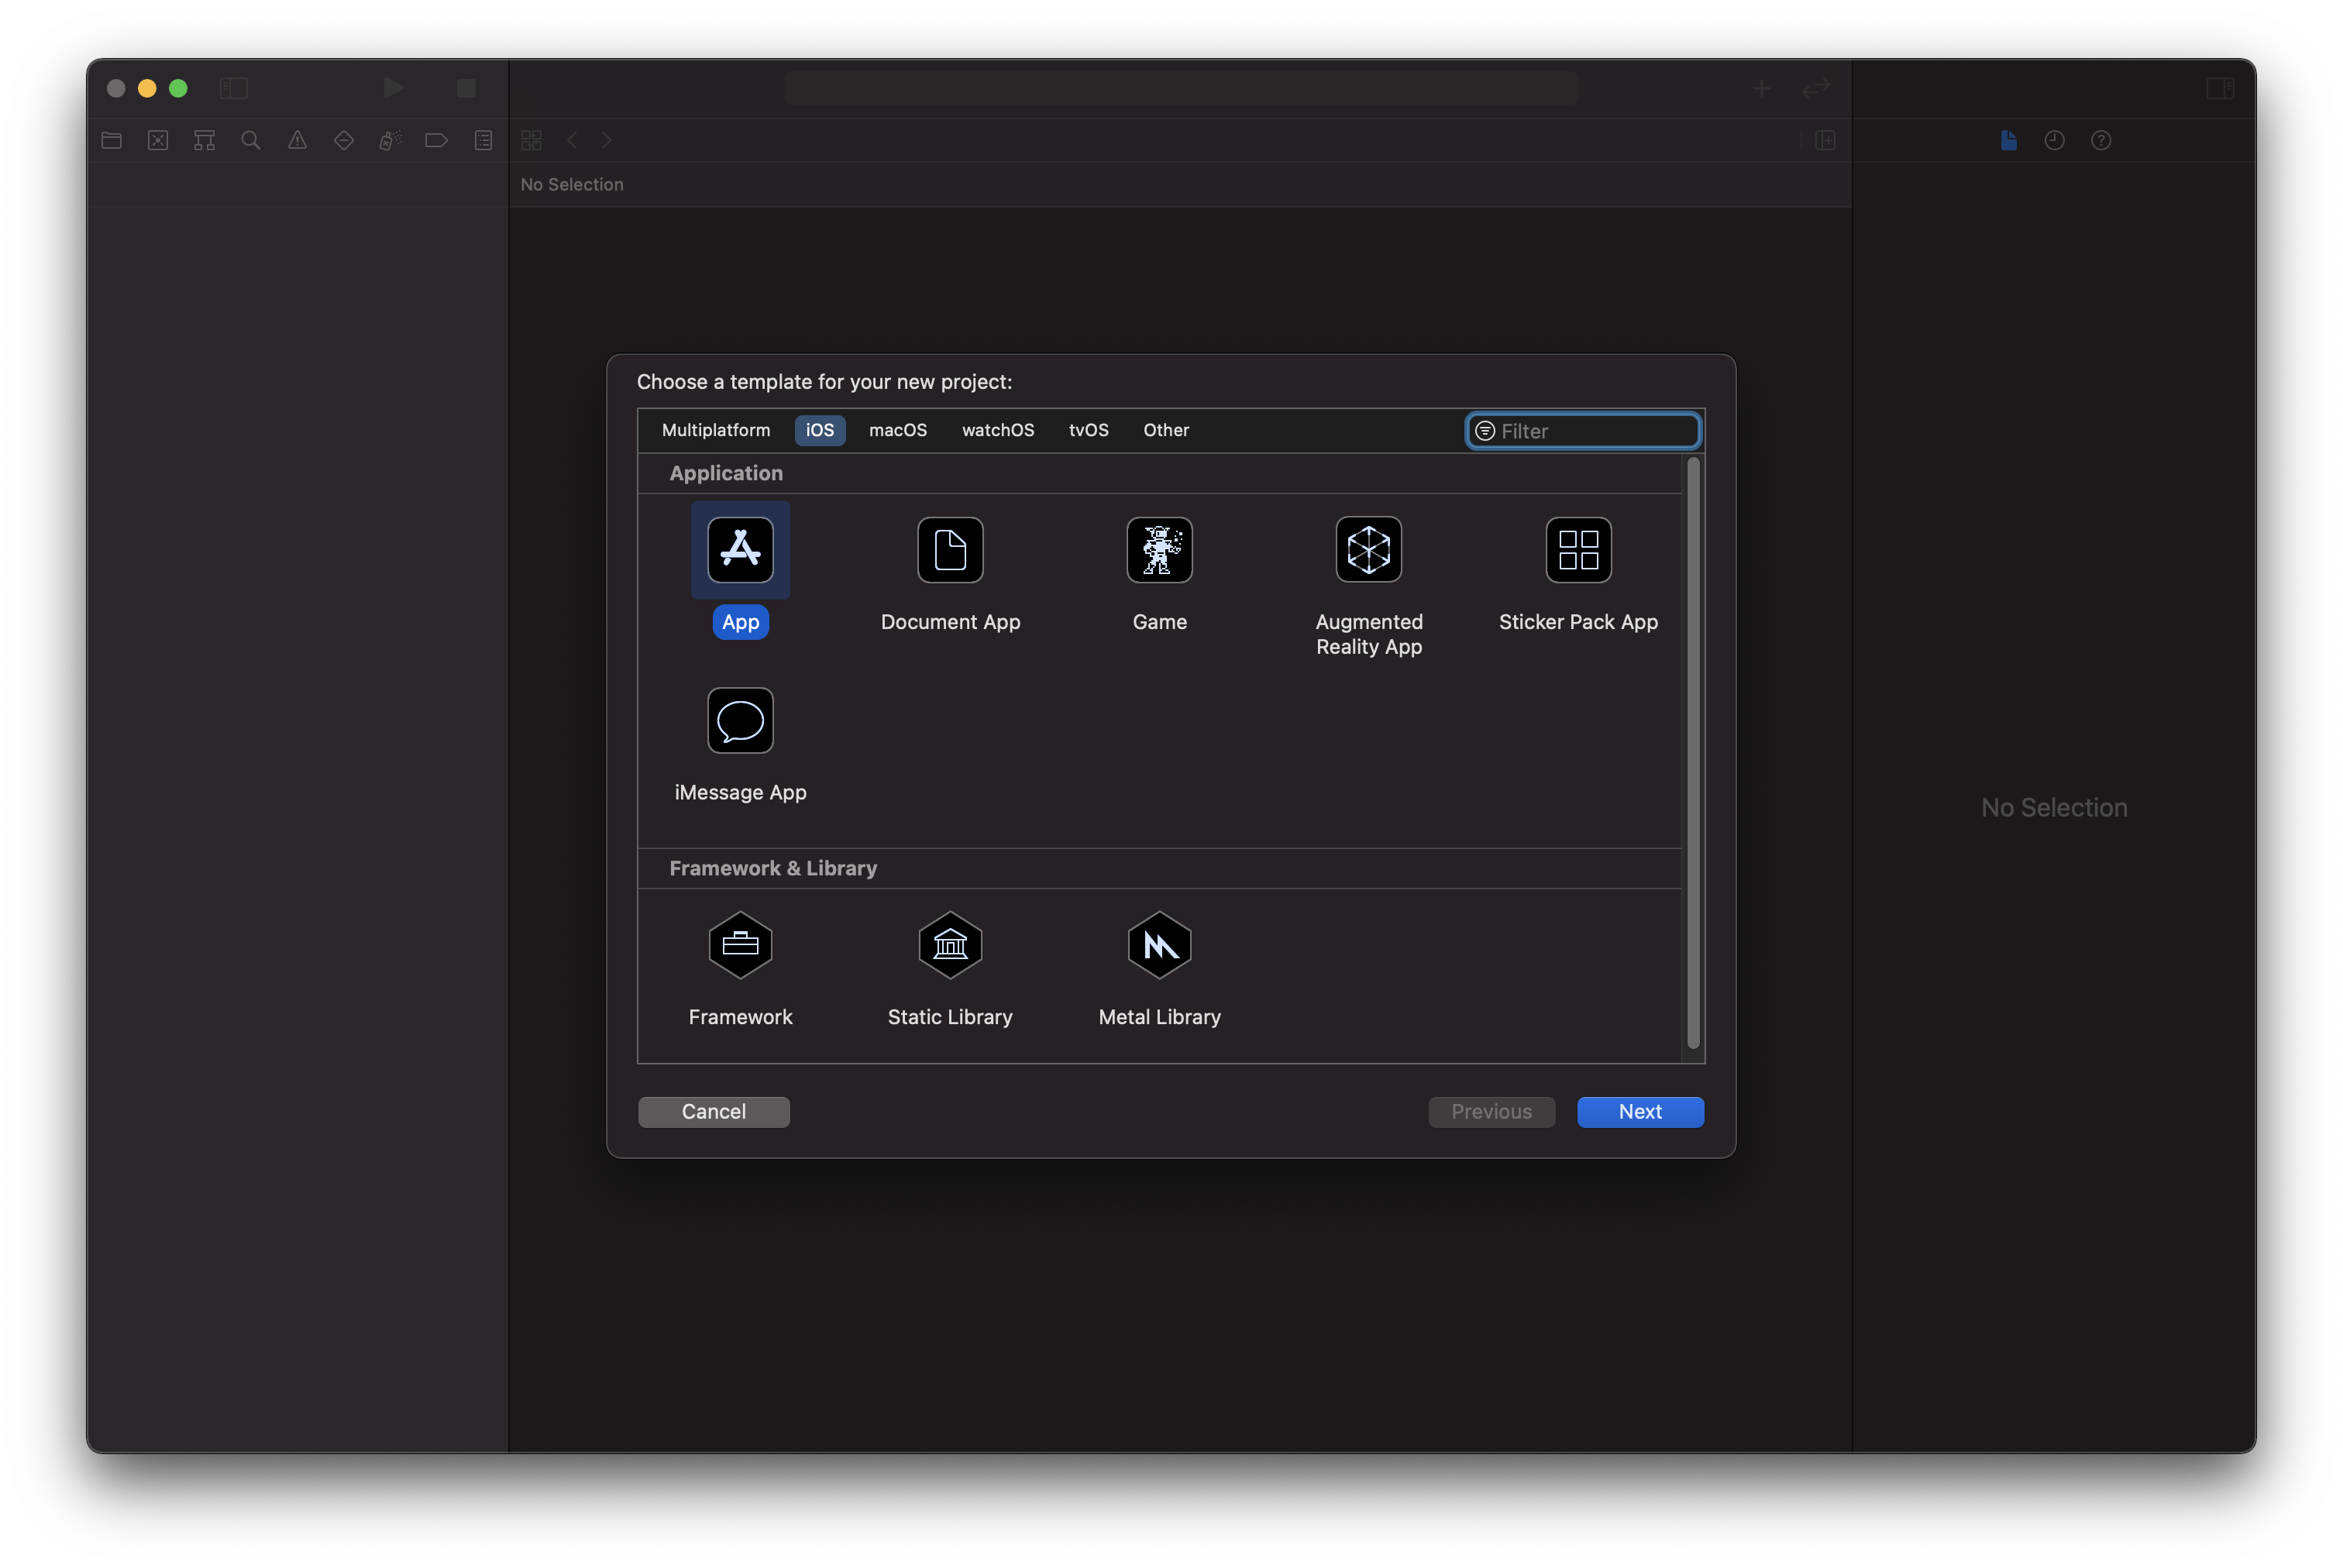
Make sure the type App is selected in the Application group, then click Next. Enter your Product Name, leave the Team as None, enter an Organization Identifier (this can be anything you want that will be unique to you), make sure the Interface is Storyboard, and leave the rest as they appear. Yours should look something like this before clicking Next:
In the next screen, choose the location on your computer where you want to save your project, then hit Create. Congratulations! You have just created your first iOS project! Before we start developing our app any further, let me give you a quick tour of Xcode, as this is significantly different from the playground files we have been working with up until this point.
Xcode Tour
After you create your project, the first screen you see will likely be similar to this one shown below. Take a look at the different highlighted areas to get an idea of the different sections of the Xcode project editor:
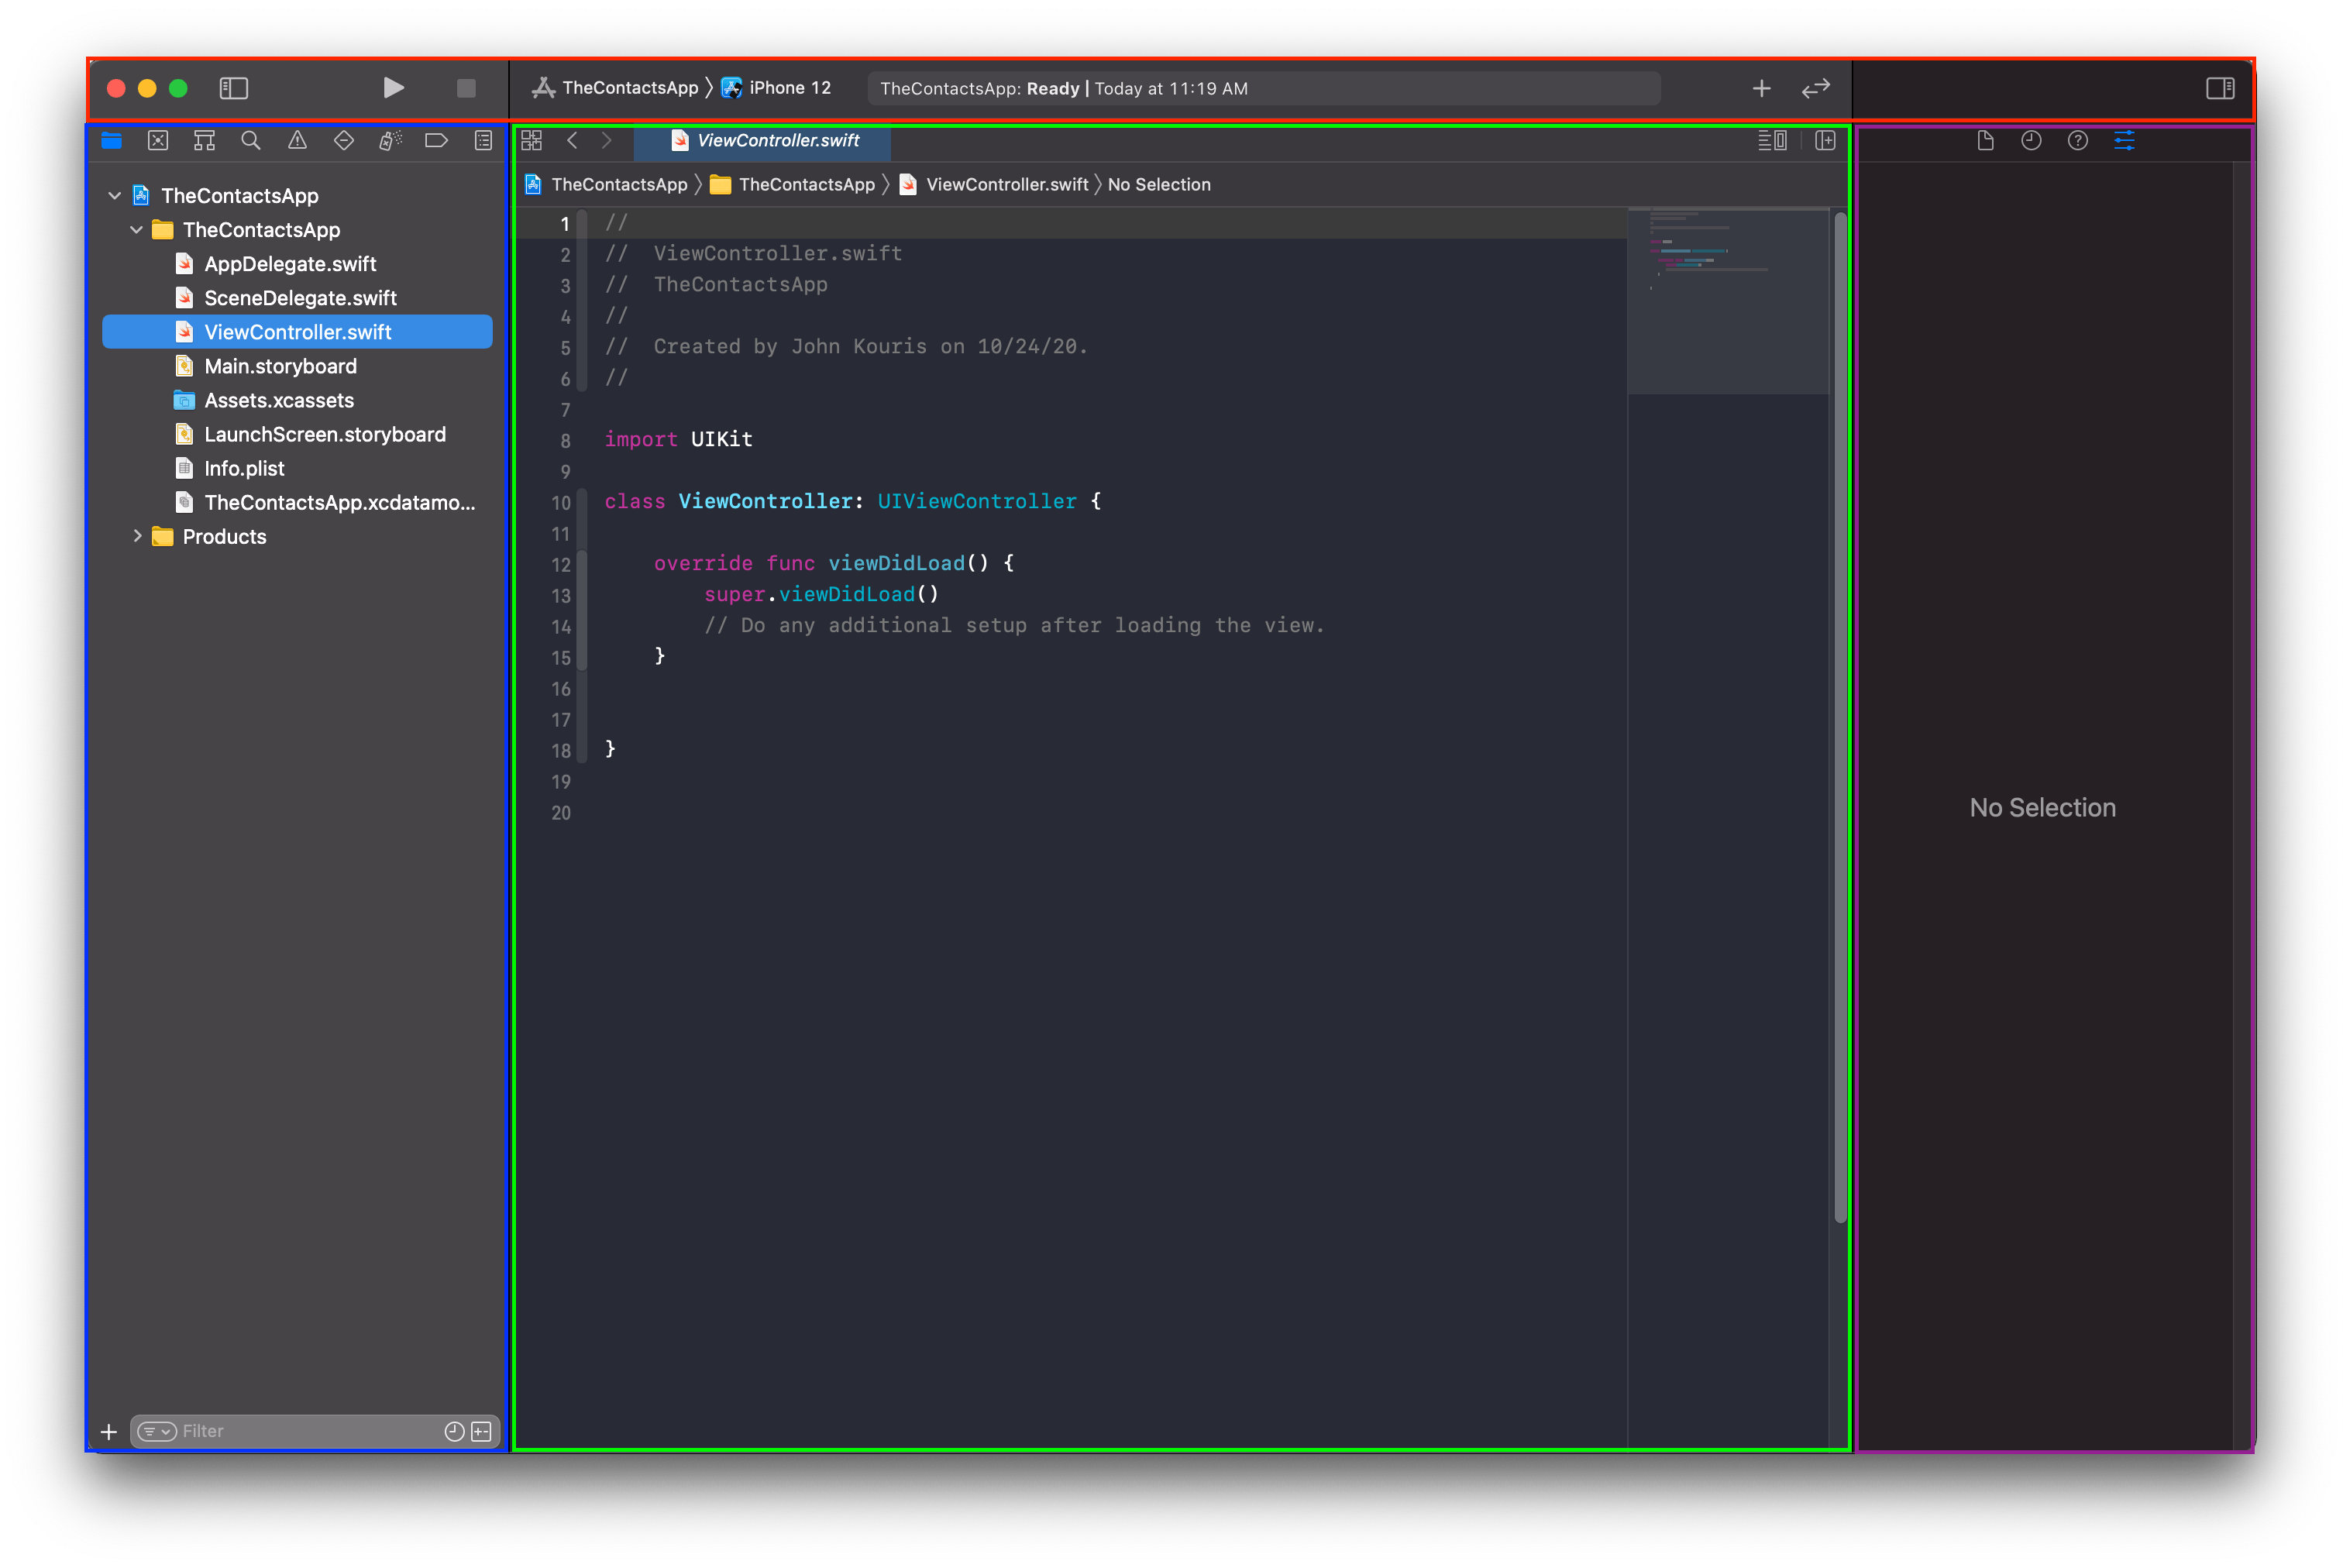 Going from top-down and left-to-right, the box highlighted in red is the
 Toolbar, the box highlighted in blue is the Navigator Area, the box highlighted in green is the Editor Area, and the box highlighted in purple is the Utility Area.
Keep this screen handy so you understand which part of the editor I am referring to as we work on the project.
Setting up our app's UI
In iOS development, there are a few ways you can create your UI, or User Interface.
- You can build the UI programmatically, which means to build everything in code.
- You can use the new SwiftUI, Apple's new declarative method for creating UI.
- You can use Storyboards to drag and drop elements onto a visual editor.
For this project, we are going to use the 3rd method. There are advantages and disadvantages to each approach, but I've found storyboards are a good introductory way of building UI for iOS applications.
To get started with Storyboards, select the Main.storyboard file in the Navigator Area. You should see this screen appear:
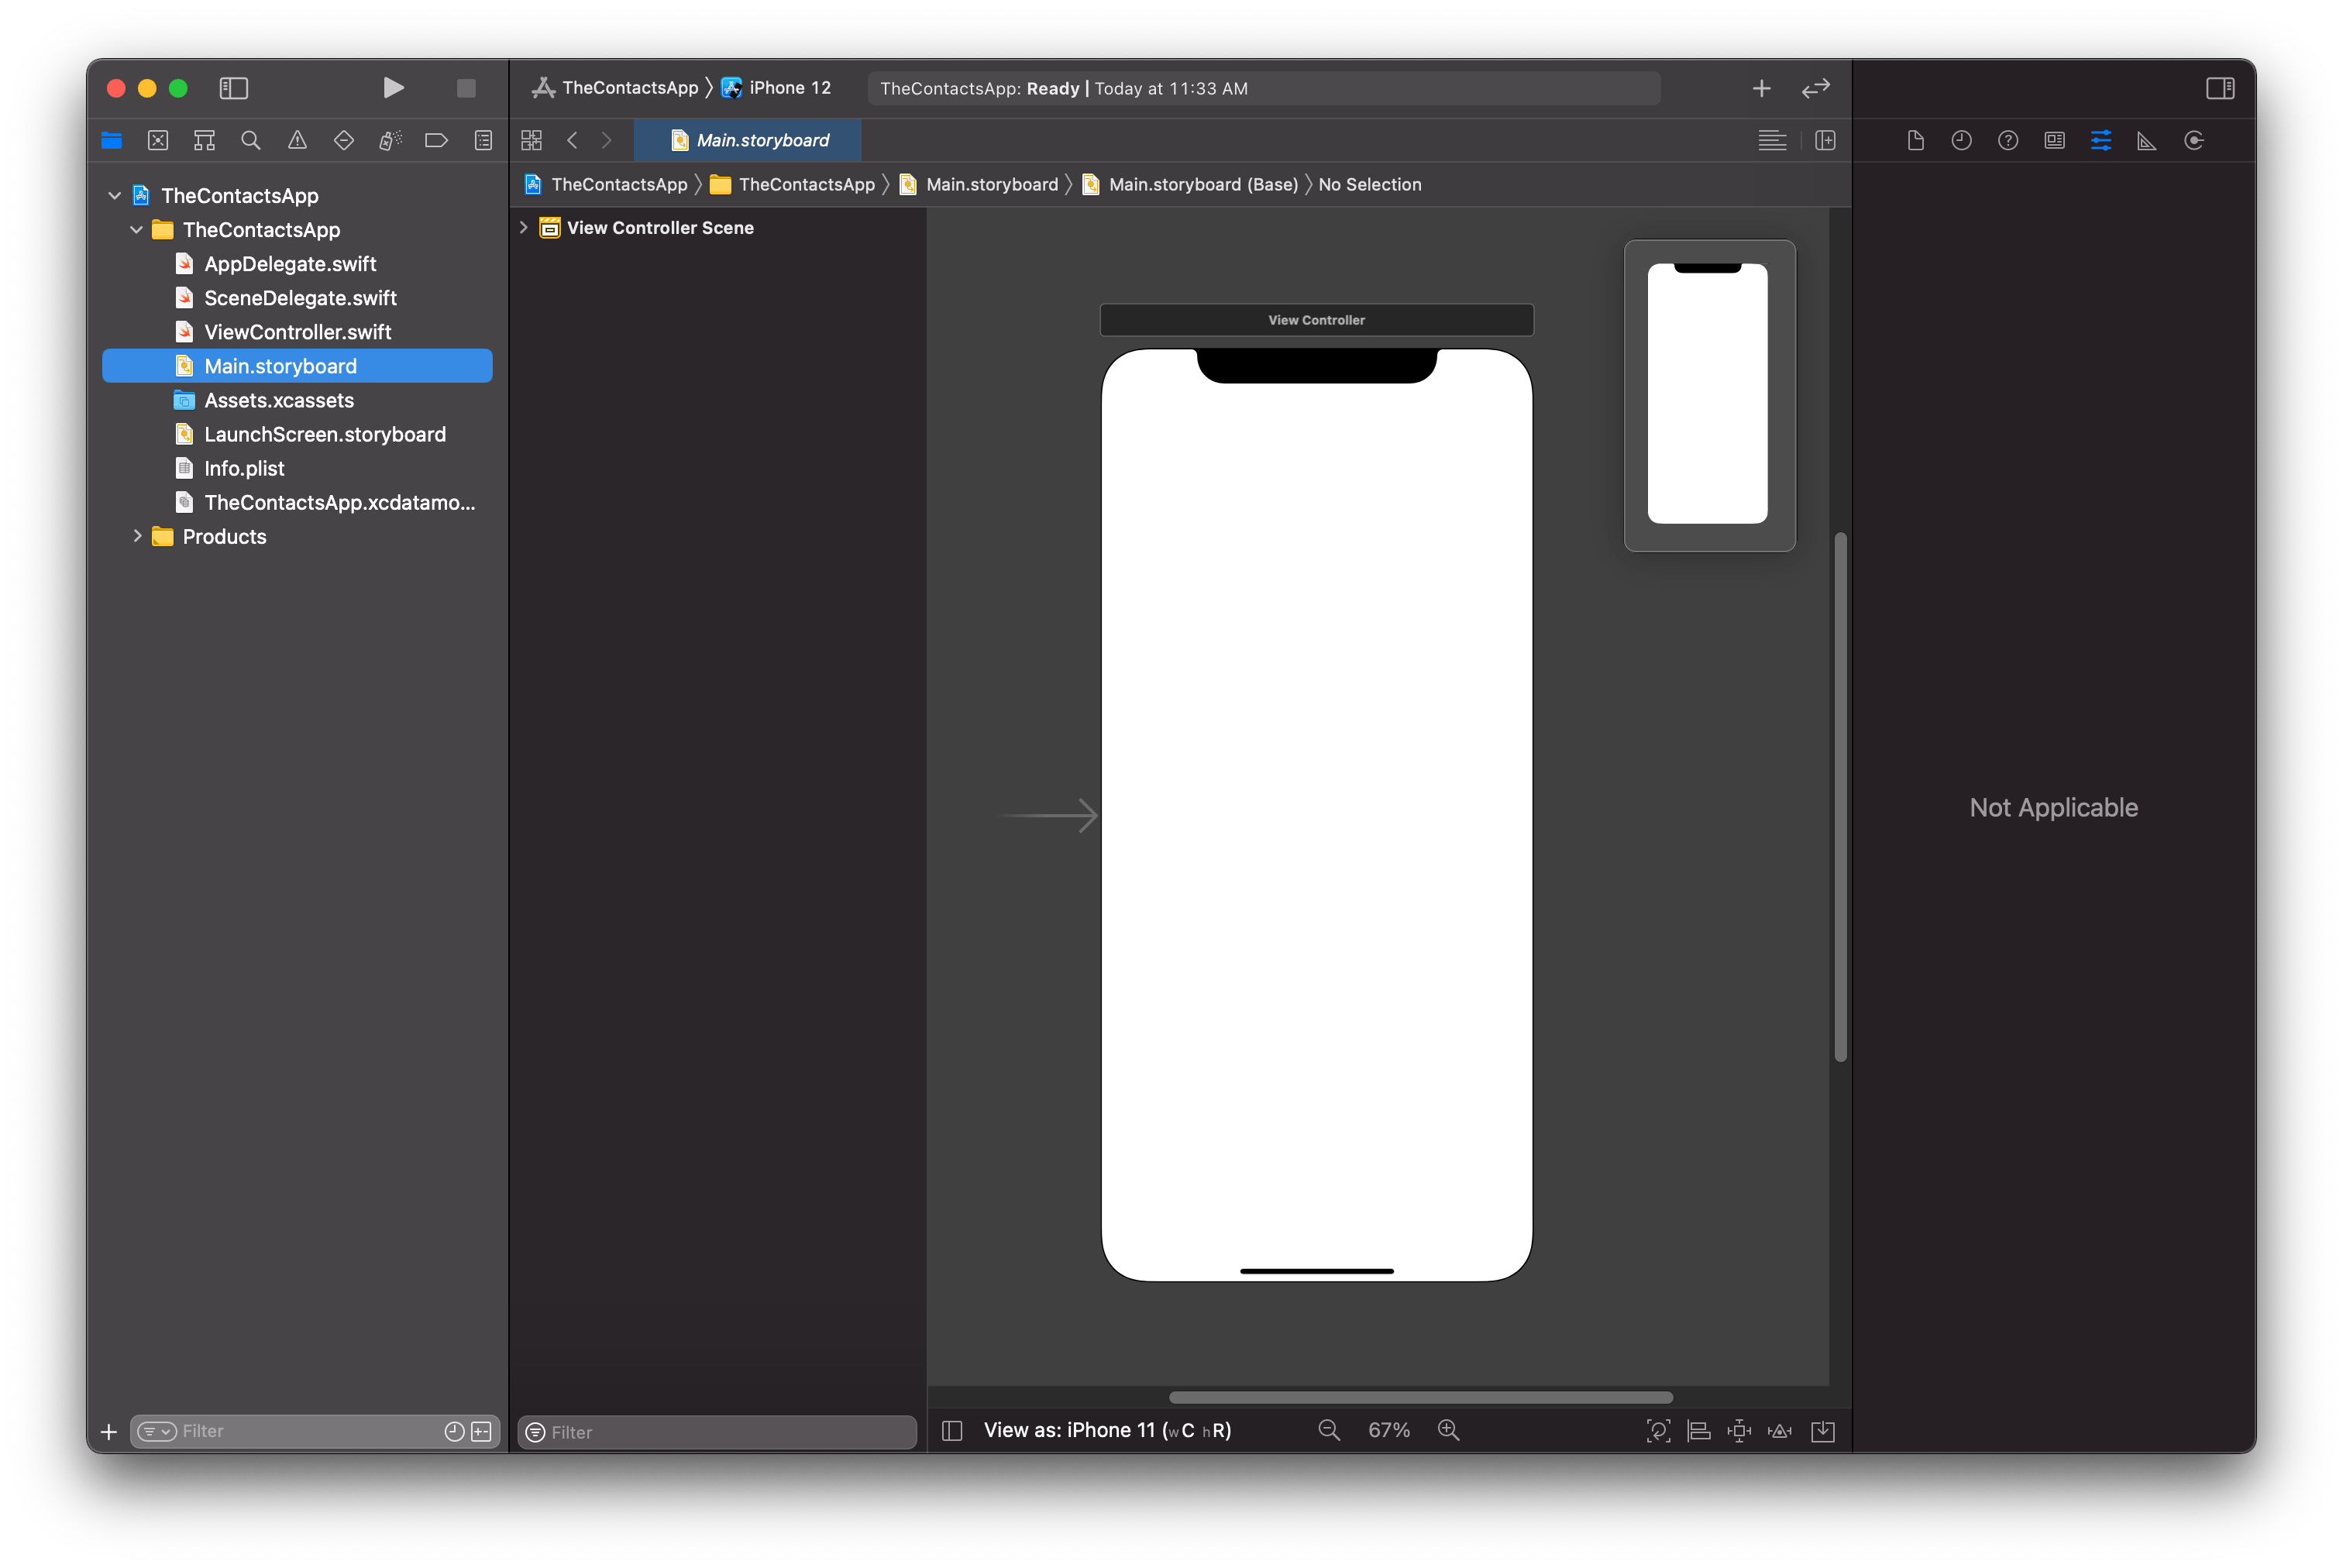
In this screen, we can see we have a blank phone-looking object called the View Controller. This is the screen that simulates what we will be able to see on the screen when we run our app. We will be dragging-and-dropping multiple elements onto our screen to get our project working. For this project, we will only need to add one button and one table view to our view controller. Let's get started.
Embedding a Navigation Controller
Before we start adding anything to our screen, we are going to embed the screen in what is known as a Navigation Controller. The navigation controller gives us some built-in functionality to make adding our plus button and app title easier. Don't worry too much about the rest for right now. Go ahead and select the bar that says View Controller that hovers over the screen. If you've made the right selection, you should see the bar turn blue and the View Controller will be highlighted in the Document Outline. See below:

In the bottom right-hand side of the Editor Area, select the button that looks like a square with a down arrow inside it. 
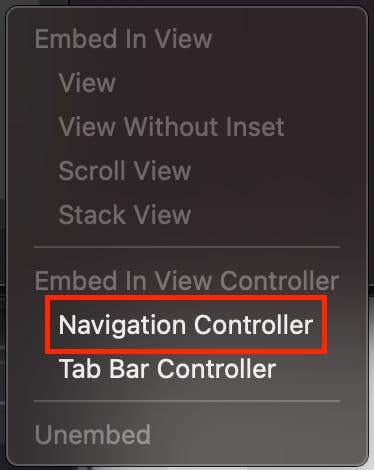
This is the Embed In button and it will allow us to embed our View Controller within a Navigation Controller. Once you click the button, select the Navigation Controller option.
You should now see that another "screen" has been added to the storyboard.

And there you have it! You just added your Navigation Controller. Don't worry about the Navigation Controller too much for right now, just know that it'll make adding our plus button much easier.
Adding the Plus Button
Now that we have our Navigation Controller set up, let's add our plus button to the upper right-hand corner of our app's screen. To add elements to your UI, you need to pull up the Library. There are a few ways you can do this. The first way is you can select the + button in the Toolbar, or you can use the keyboard shortcut Cmd + shift + L.

You should now see the library pop up somewhere on screen and it will look like this:
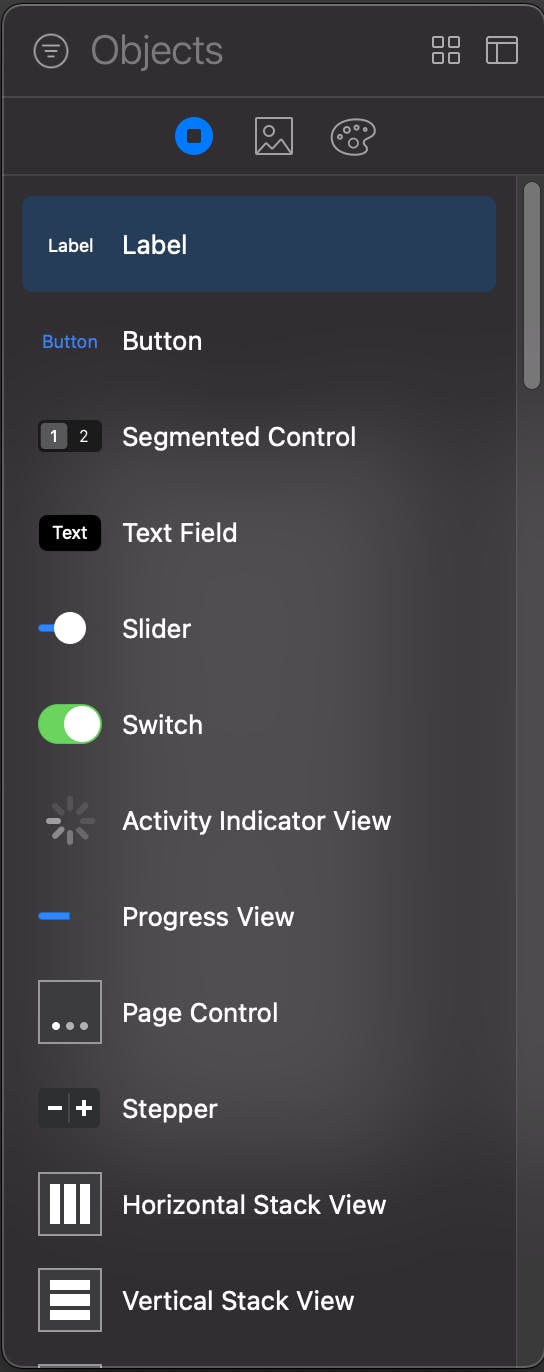
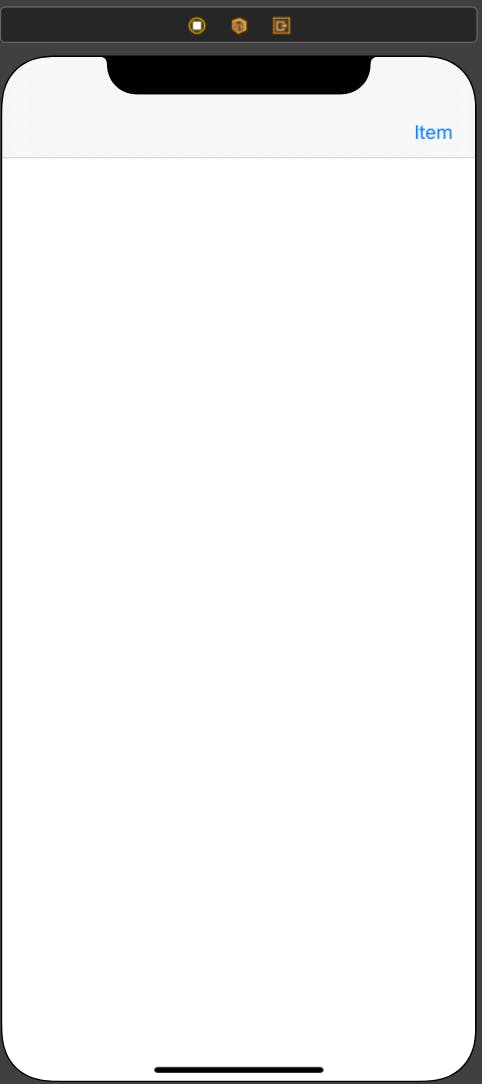
Use the search bar in the object library to search for a Bar Button Item. Drag-and-drop the Bar Button Item into the upper right-hand corner of the View Controller screen. If you've done this correctly, your View Controller screen should now look like this:
We want to change our button from showing Item to showing a +. To accomplish this, select the button, and make sure you see the Attributes Inspector is highlighted in the Utility Area.
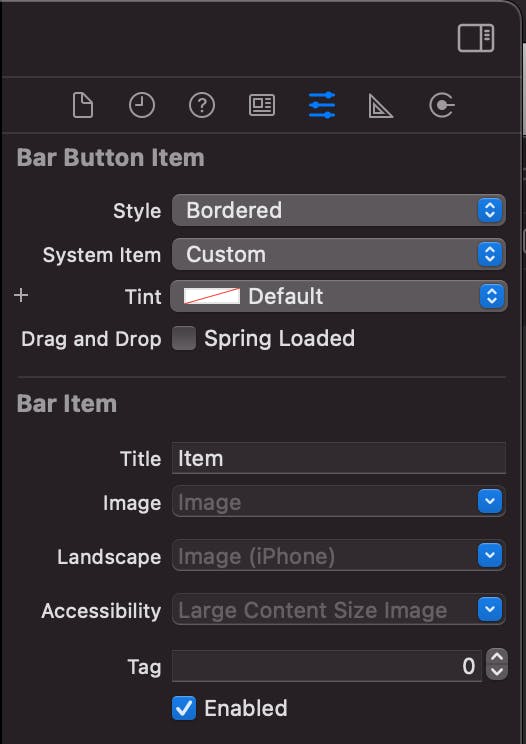
Change the System Item dropdown from Custom to Add. Immediately, you should see that the button you added on the screen has changed to display the +.
Adding the Table View
Next, we are going to add a Table View to our View Controller. A Table View is a class created by Apple that gives developers the ability to display items in a list. Table views are popular and are used by many iOS applications. Open your phone and look at an app like Settings.
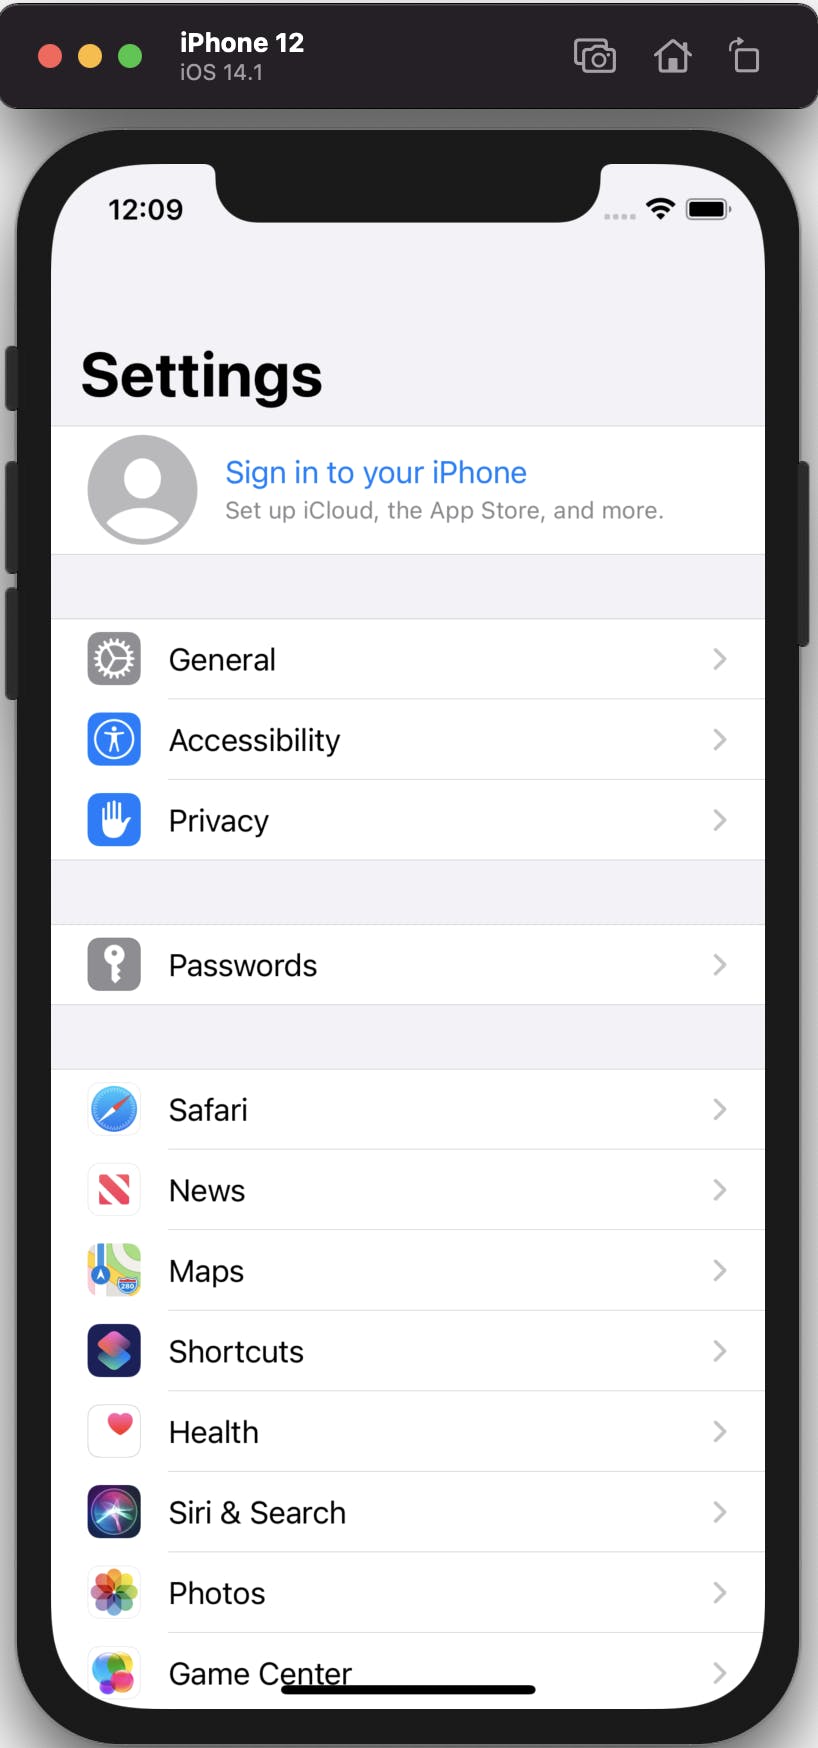
This is a table view and each row is a cell within that table view. We'll talk more about the details of table views and cells in the next post. For right now, just know table views give us a way to organize items in a list.
Similar to adding our button, we are going to drag-and-drop a table view from the object library onto our View Controller. Go ahead and do that now. Search for Table View in the object library and drag-and-drop it onto our View Controller. Note: make sure you grab the Table View and not the Table View Cell or Table View Controller as these are completely different objects that won't give us what we want.
If you've done this properly, you should see something like this on your view controller's screen:
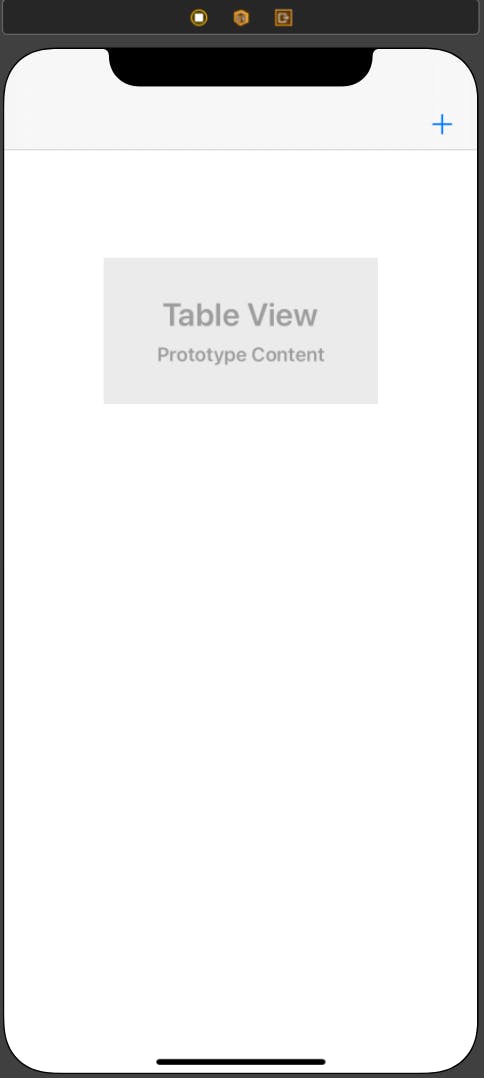
Now, we want to fill the entire screen with the Table View, not just a small part of it. Go ahead and resize the Table View by dragging its corners to match with the corners of the phone. Your View Controller screen should now look like this:
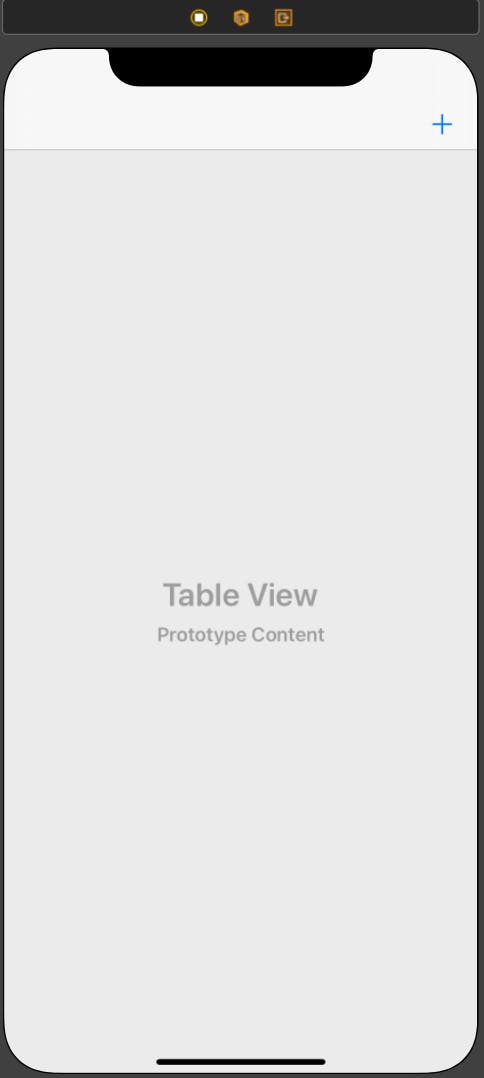
Now, as I'm sure you're aware, there are many different sizes of iPhone screens. We want to make sure that our table view is going to fill the entire screen for any iPhone. We will make sure this works by adding Constraints to the table view. In order to do this, select your Table View, then click on the box with 4 T shapes coming off of it in the bottom right-hand side of the Editor Area. This is the Add New Constraints button and looks like this:

Once you click the button, you will see a new window pop-up. Be sure to enter 0 in each of the four text areas and that the bars are highlighted in red. It should look like this if each value is entered properly:
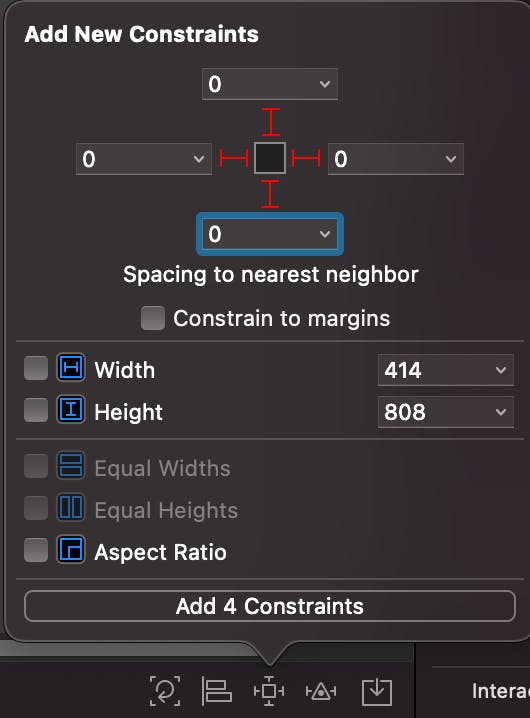
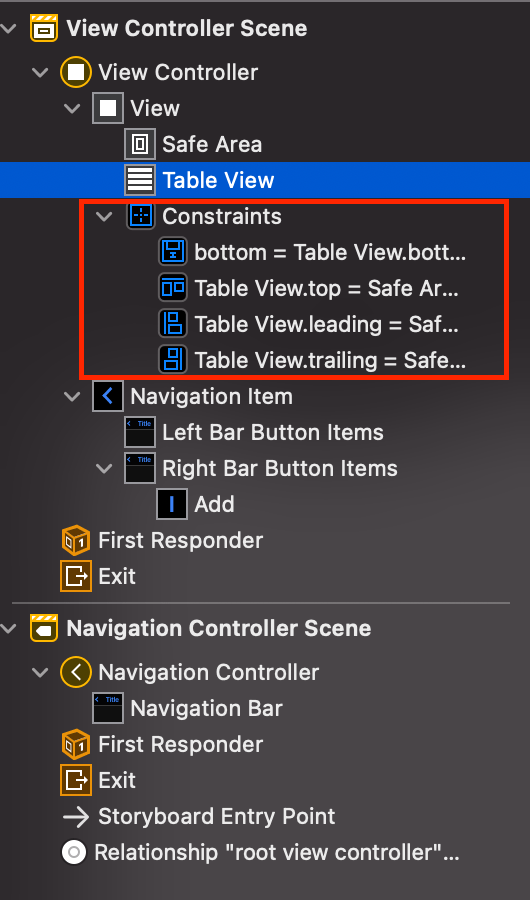
When you're ready, press the Add 4 Constraints button at the bottom of the popup. You should now see that the table view has been highlighted in blue and a new Constraints section has been added in the Documents Outline.
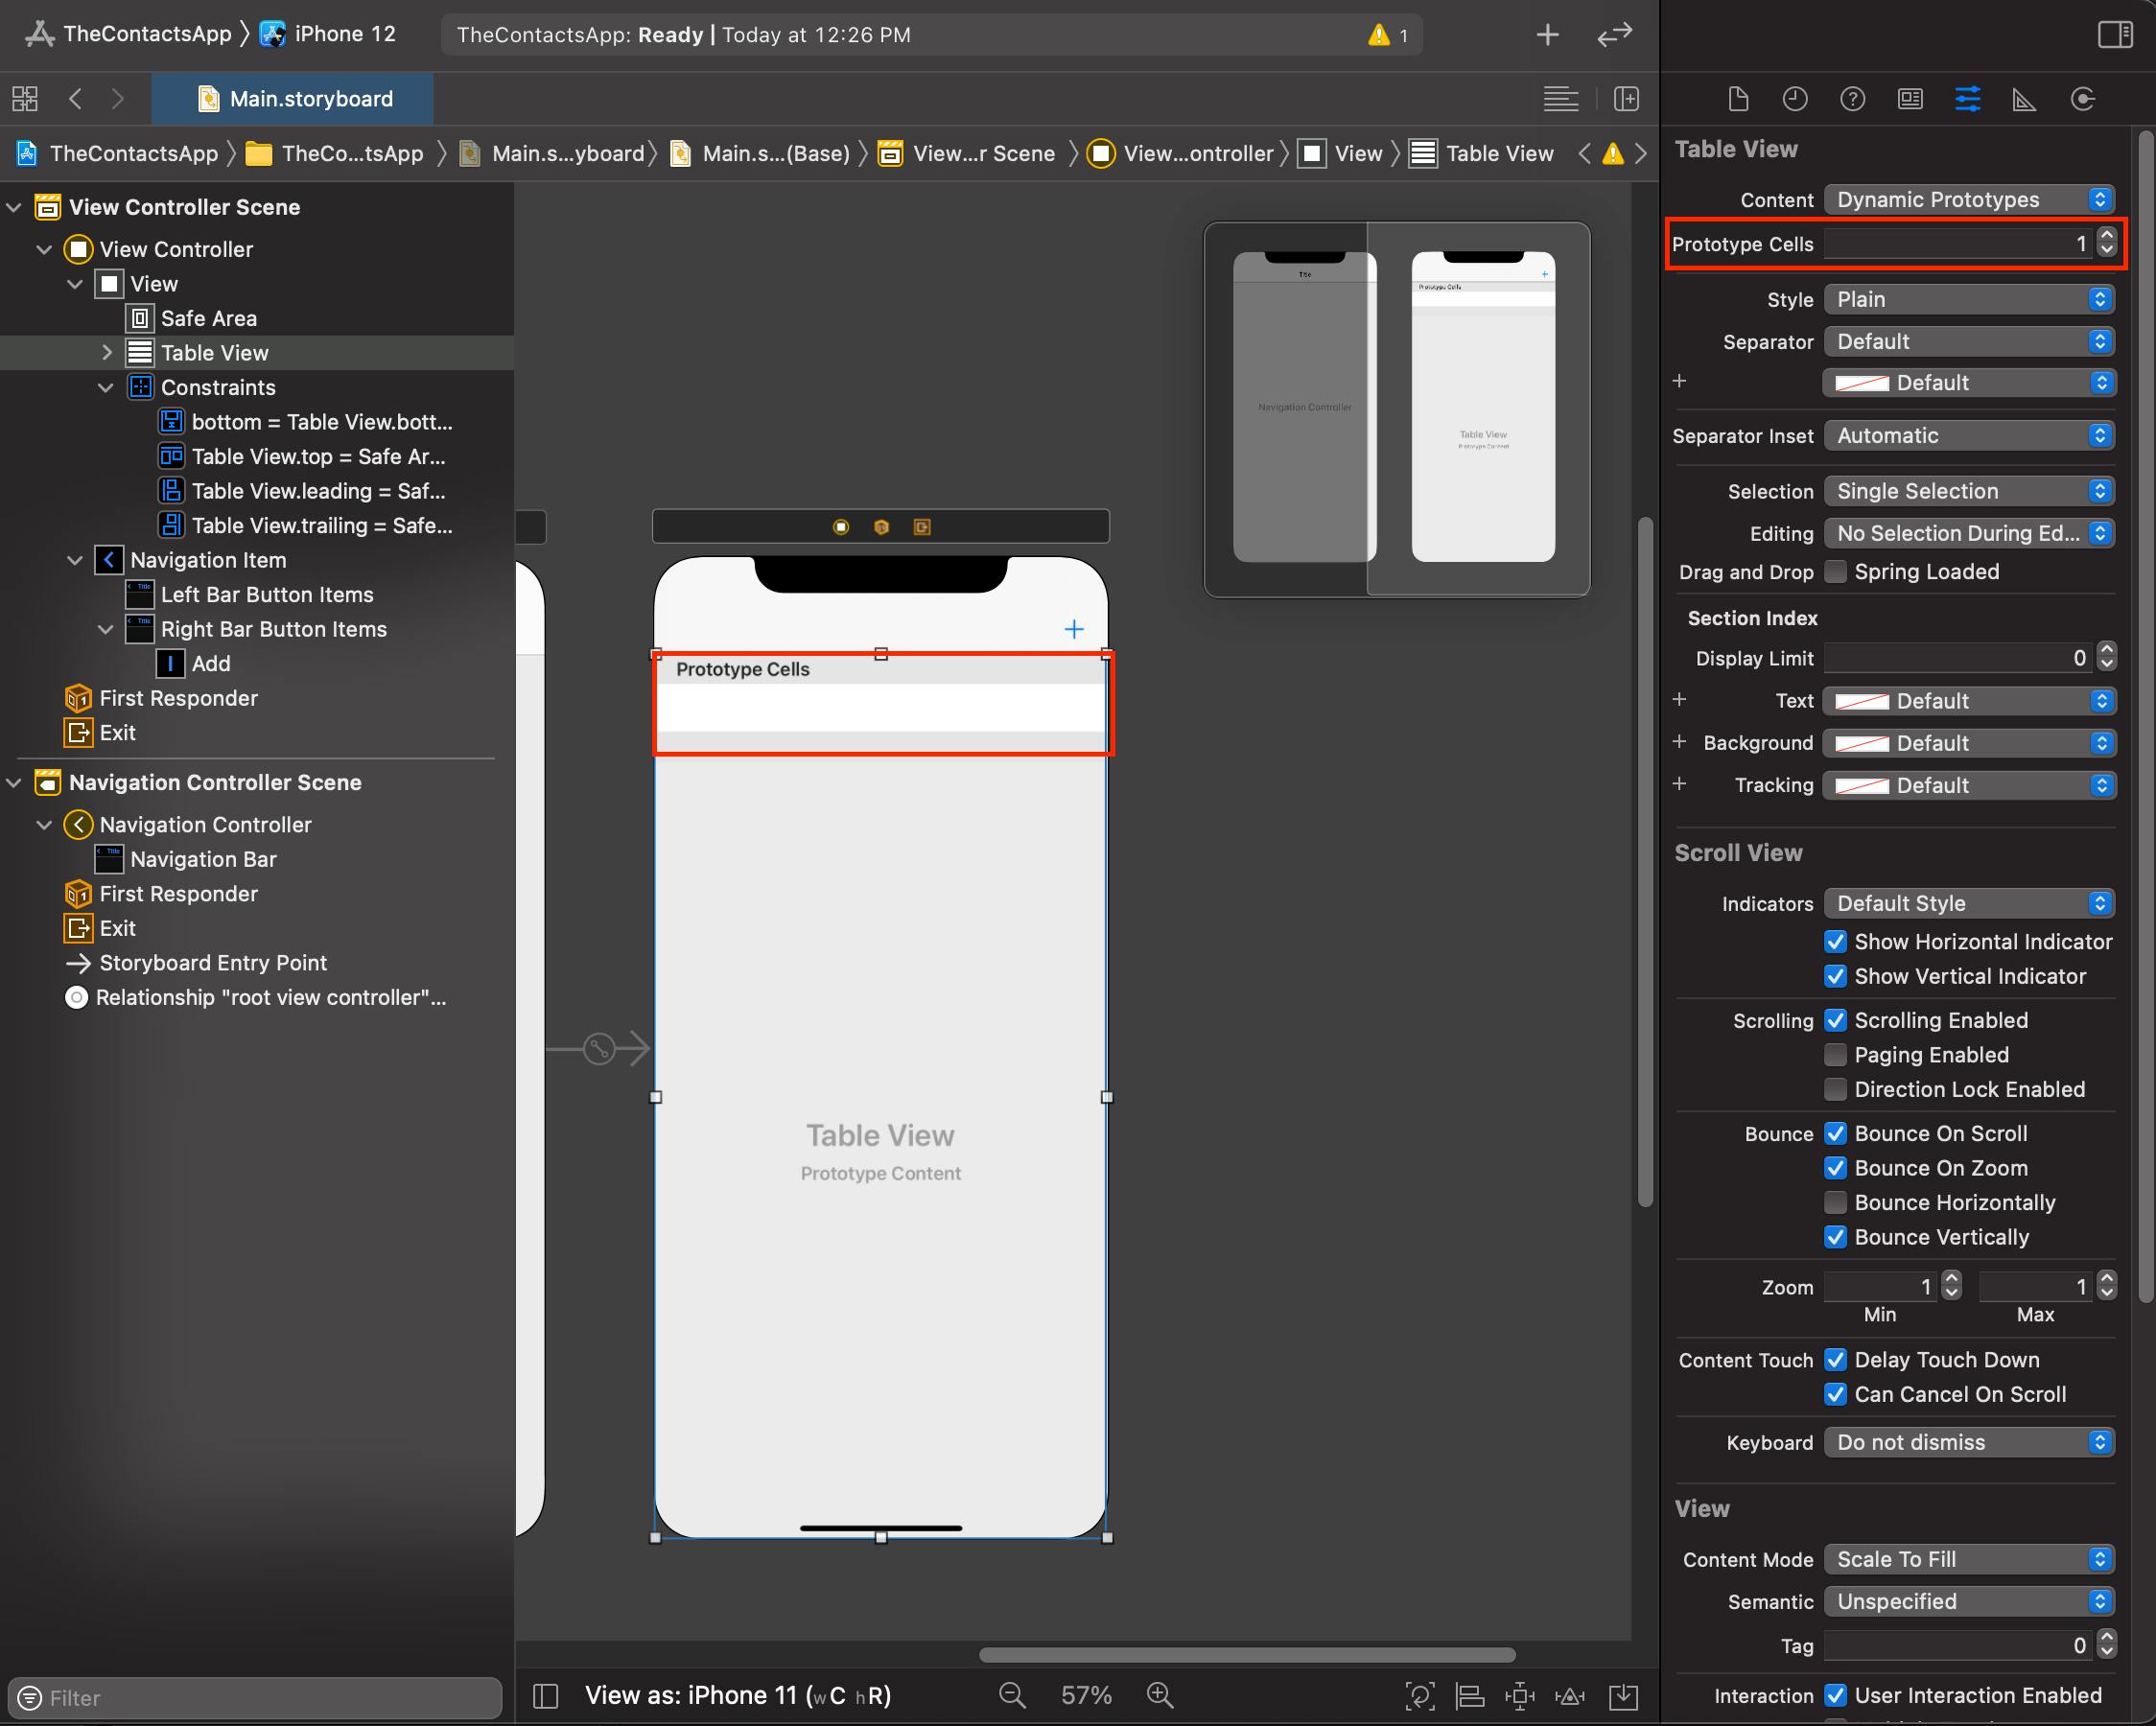
Now that we've set the constraints for the size of our table view, we are going to add a single Table View Cell to our table view. This is quite simple. Select your Table View, and over in the Attributes Inspector, change the value of the Prototype Cells from 0 to 1. You should instantly see a new cell has been added to your table view.
Wrap Up
And there you have it! You have successfully set up the UI for your very first iOS application. I understand there are a lot of moving parts and new things that I introduced in this post, and we didn't even write any code! Take your time and reread when you need to. Once you have set up this UI with the instructions, try setting up this entire project on your own. Create a new project and add the UI elements and constraints. The more you practice setting up projects and creating the UI in storyboards the easier it will get. If you have any questions, feel free to add them in the comments below and I will get back to you. Stay tuned for future posts where we will dive into the code and make our app do something!
Happy coding!