

Getting Started with Classes
In my last article, I discussed how to declare variables and constants, and touched on some of the different data types Swift gives to you by default. In this article, I want to expand your Swift knowledge by introducing you to two general purpose constructs that allow you to group your code together in logical ways. If you read my Swift Basics article, you should already have your playground file set up. In that article, we made some variables and constants like the ones below:
let myName = "John"
let myBirthMonth = "October"
var myAge = 27
What do each of these pieces of information all have in common? Each of these properties describes a person. While I wrote these properties to refer to me, specifically, we could generalize these properties to describe any person. How can we make a more generalized grouping of related properties? We can create what is known in Swift as a Class. Creating a class in Swift is quite simple. Look at how it is done below:
class Person {
    let name: String
    let birthMonth: String
    var age: Int
}
You will receive an error, but don't worry about it for right now as I will explain more in a little bit.
As you can see, we created a class by using the Swift keyword class and gave it the name, Person. (It is common convention in Swift to capitalize your class names). Then, we added the properties that each Person will have in a set of curly brackets. Notice, we did not specify values for each of our properties, we simply gave the properties a name and a type so that Xcode will know a Person should have a name, birthMonth, and an age.
Now, let's talk about that error message that popped up, what is the error?

What this error is telling us is that the class we just wrote has no way of understanding how to assign values to each of our properties. This will require a bit of a discussion on Initialization - what is it?, and how do we fix our error?
Please note: I have no intention of going into a full deep-dive discussion on initialization, custom initializers, setting default values, etc. I want to give you the basic understanding you need to get up and running quickly with classes in Swift. If you're interested, you can read more on initialization from the official documentation here.
Initialization Basics
In very basic terms, when a programmer initializes a class, that means he or she is preparing the class for use. As programmers, we have to tell Xcode how this class is going to be used and how the properties for the class are going to be set. How are we going to do that? We are going to create our own initializer using the init() method. Add the following code to your Person class right below the properties you created earlier:
init(name: String, birthMonth: String, age: Int) {
    self.name = name
    self.birthMonth = birthMonth
    self.age = age
}
What we have done is created a custom initializer that is going to set the values for each of our properties based on the inputs we give when we create an instance of that class. Now you might be thinking, "huh?". That is okay. I promise it will make more sense once we start creating some examples. But before we do that, make sure your Person class looks like the following before reading the next section:
class Person {
    let name: String
    let birthMonth: String
    var age: Int

    init(name: String, birthMonth: String, age: Int) {
        self.name = name
        self.birthMonth = birthMonth
        self.age = age
    }
}
Creating People
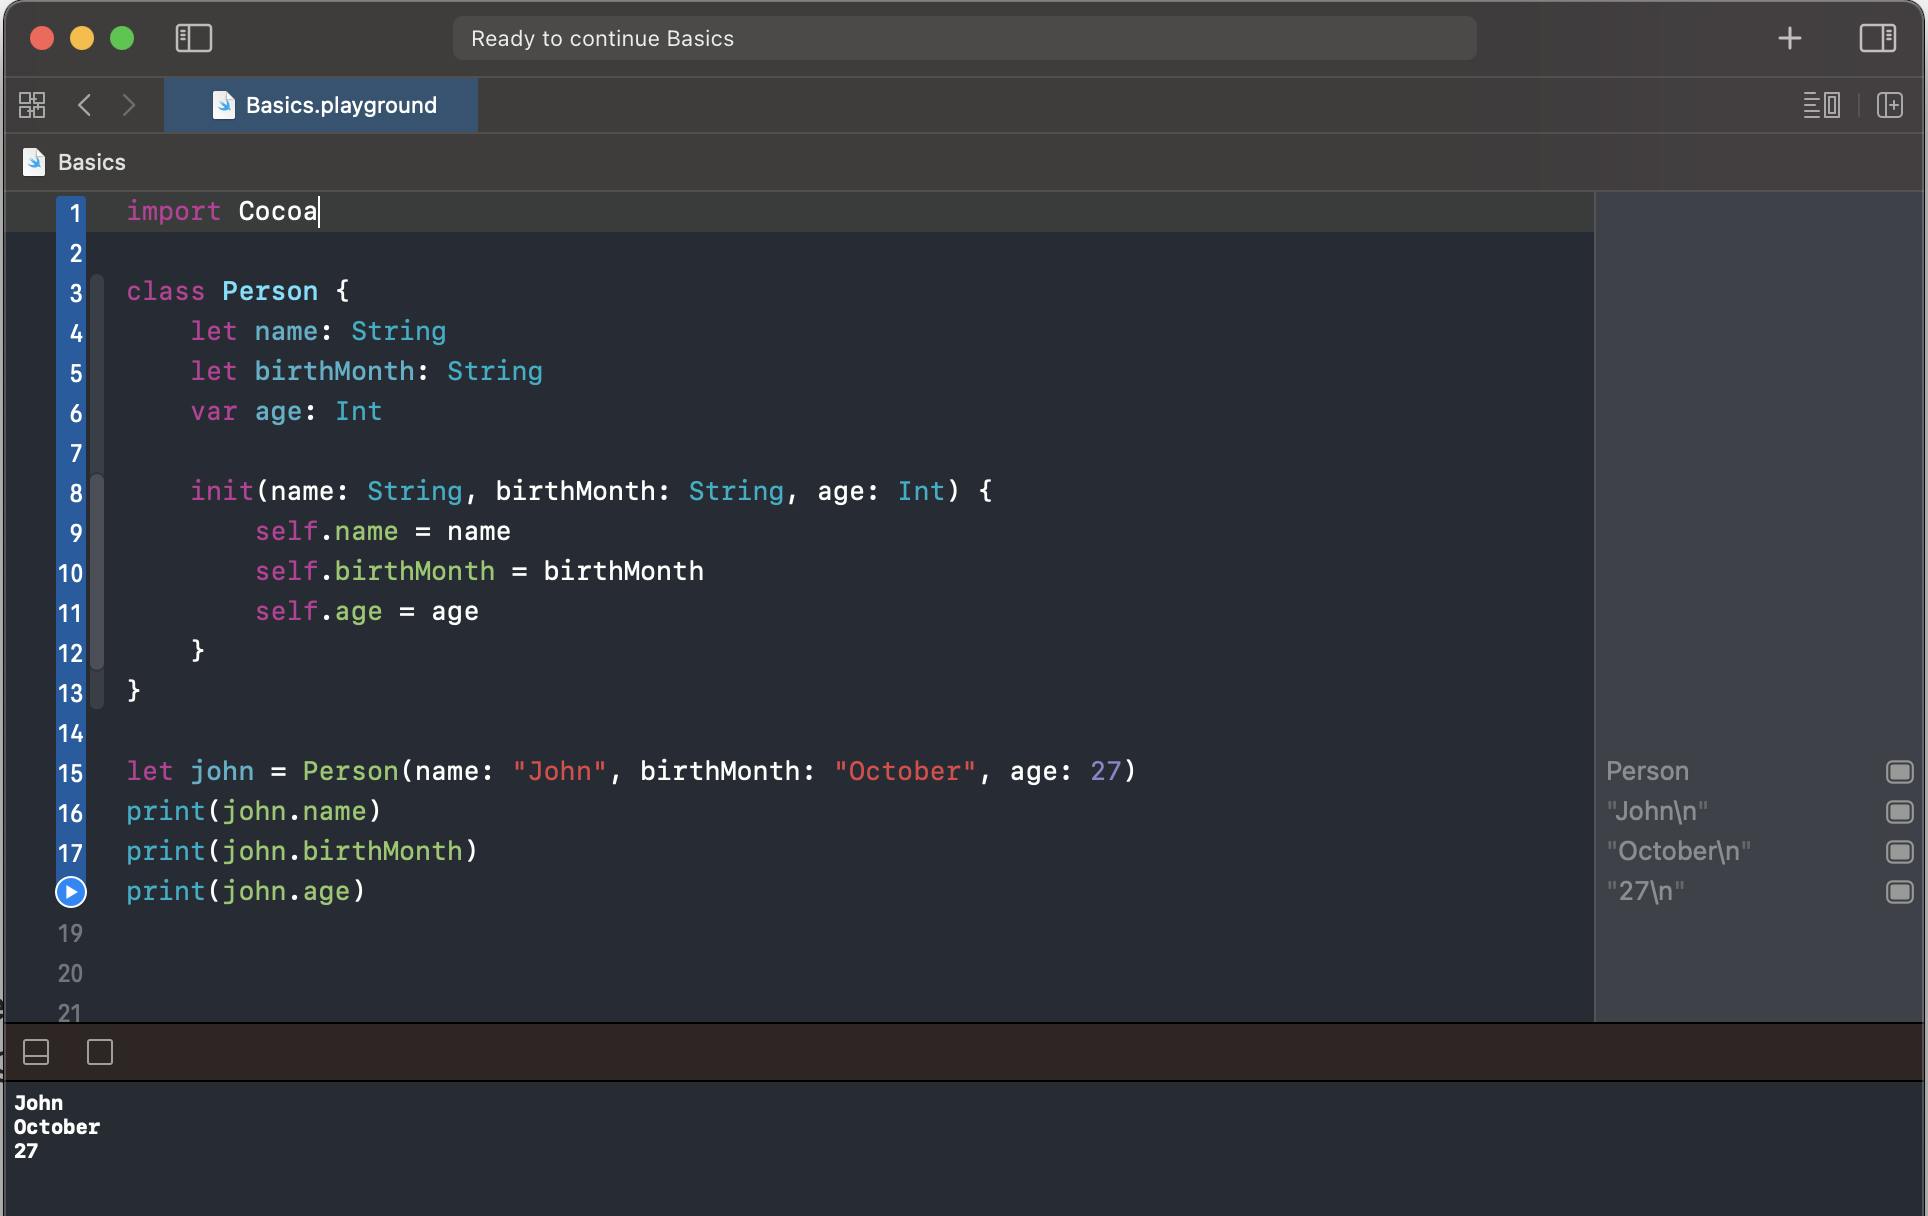
Now, we have come to the point where we are going to start creating some People using our Person class. We are going to create a new instance of the Person class and populate all of the values for its properties. Go ahead and add these lines of code to your file (after the closing curly bracket of the Person class), and feel free to enter your own values for each of the properties:
let john = Person(name: "John", birthMonth: "October", age: 27)
print(john.name)
print(john.birthMonth)
print(john.age)
We just created a new instance of the Person class and named that instance john. Below our new person instance, we use the print() function to display the values for each of our properties in the Debug window when we run our playground file. If you have never run a playground file before, simply click on the sideways carrot to the left of your lines of code. Your playground file should look the same as below:
Congratulations! You just made your first class and first class instance using Swift. Next, let's talk about another useful construct for grouping code together, a Structure.
Getting Started with Structures
You'll be happy to know that Structures or Structs are very similar to classes and are even easier to implement. To create a Struct, you simply declare it using the struct keyword, give it a name, and add any properties or methods that you want in the struct. Sticking with our Person example, we can rework our Person class to be a Person struct by making the following changes:
struct Person {
    let name: String
    let birthMonth: String
    var age: Int
}
That's it! That's all there is to it. You will also notice that, unlike with our class implementation of Person, we aren't getting an error for not having a custom initializer. Why is that? When we create a struct, Swift automatically generates the initializer for us behind the scenes, no need to create our own.
Go ahead and create another instance of Person. You should see that the process for doing so is exactly the same as when we created a Person instance as a class.
Inheritance and Classes
I think a valid question for anyone just starting to learn Swift is: "When should I use a Struct and when should I use a Class?" Well, if you follow the recommendations from the Swift documentation you will see that the recommendation is basically "use structs by default, unless you have to use a class."
One clear case for using a class is for something we are going to discuss right now, which is Inheritance. Inheritance allows one class to inherit characteristics from another class. Note that you can't use inheritance with structs, it is limited to classes. To give a basic example, add the following lines of code to your playground file:
class Vehicle {
    let color: String
    let engine: String

    init(color: String, engine: String) {
        self.color = color
        self.engine = engine
    }
}

class Car: Vehicle {
    var numberOfWheels: Int = 4
}


let car = Car(color: "black", engine: "V8")
print(car.numberOfWheels)
This gives us an example of class inheritance in action, so let's break it down. The Vehicle class has two properties (color and engine) and an initializer that will set the value for the color and engine when an instance of Vehicle is created. That's nothing new as we did something very similar with the Person class. What is new is we have created a second class Car that is inheriting from the Vehicle class. We have added an additional property that will apply to each car we create and that is its numberOfWheels. We give a default value of 4 to this new property as most cars have 4 wheels.
Where it gets interesting is when we go to create a new car instance. If we look at the line let car = Car(color: "black", engine: "V8") we see that we are specifying values for properties that were created in the Vehicle class, not the Car class. How is this possible? This is the power of inheritance in action. We told Xcode that we want our Car class to inherit from the Vehicle class. This means every Car gets the color and engine properties without us having to specify them directly in the Car class. Finally, we are going to print out the value of the numberOfWheels property. As we expected, we can see that this instance of car does indeed have 4 wheels.
While I understand this is a highly contrived and simplistic example, trust me when I say this becomes invaluable once you start making real applications. Inheritance gives us the power to integrate code that has already been created for us, without having to rewrite everything ourselves.
Wrap Up
And there you have it, your introduction to using classes and structs in Swift! I highly recommend you check out the official Swift documentation here to get a better understanding of classes, structs, and when to use one or the other.
I encourage you to play around with creating your own classes and structs. Assign values to your properties and try changing them.
Can you declare an instance of Car as a constant and change its properties after you first create it? Give it shot, see what happens.
What happens if you don't give the numberOfWheels property the default value of 4? Do you run into any errors?
The best way to learn is to experiment; try new things, break things, research how to fix them. I promise, no error you get in Xcode is going to destroy your computer, so keep experimenting.
Stay tuned for more posts coming soon. Happy coding!